In addition to being a CLI, Coyote also has a built-in REPL (Read-Execute-Print-Loop). This enables users to quickly try out prompts, commands, configurations, and everything in between without having to modify the same command every time.
You can enter the REPL by simply typing coyote without any follow-up flags or arguments.
Features
The REPL has features that are intended to make your Coyote experience as easy and as enjoyable as possible! This includes things like
- Tab Autocompletion: Every command in the REPL (i.e. everything that starts with a
.) has fuzzy search auto completions..<tab>to complete REPL commands.<tab>also offers enabled macros (with their descriptions) as top-level custom commands.model <tab>to complete chat models.set <tab>to complete configuration keys.set key <tab>to complete configuration values.mcp auth <tab>to complete remote MCP server names.macro <tab>to complete macro names and theenable/disablesubcommands.list <tab>to complete the listable kinds (roles,sessions,agents,rags,macros,skills,prompts,tools,mcp-servers,bundles).prompt <tab>to complete MCP servers, then prompt names, thenkey=arguments, queried live from the running servers (see.promptbelow)
- Multi-Line Prompts: You can also type prompts that span more than one line to help organize your thoughts. This
can be done in the following ways:
Ctrl-oto open the current input buffer in your preferred editor (either the value ofeditoror$EDITOR)- You can paste multi-line text
- You can type
:::to start multi-line editing, and use:::to finish it. - And finally, you can use hotkeys like
{ctrl/shift/alt}+enterorctrl-jto insert a new line directly in the REPL.
- History Search Press
ctrl+rto search the REPL history, and navigate it with↑↓ - Configurable Keybindings: You can switch between
emacsstyle keybindings orvistyle keybindings - Custom REPL Prompt: You can even customize the REPL prompt to display information about the current context in the prompt
- Built-in user interaction tools: When function calling is enabled in the REPL, the
user__select,user__confirm,user__input, anduser__checkboxtools are always available for interactive prompts. These are not injected in the one-shot CLI mode.
REPL Commands
All REPL commands begin with a . to indicate that they're not part of a prompt. The following list details the
commands available in Coyote:
.model - Change the current LLM
When browsing models in the REPL, use the following legend to understand the purpose of each column in the model table:
openai:gpt-4o     128000 /     4096  |       5 /     15    👁 ⚒
|                 |            |             |       |     |  └─ supports function calling
|                 |            |             |       |     └─ support vision (multi-modal)
|                 |            |             |       └─ output price ($/1M)
|                 |            |             └─ input price ($/1M)
|                 |            |
|                 |            └─ max output tokens
|                 └─ max input tokens
└─ model id
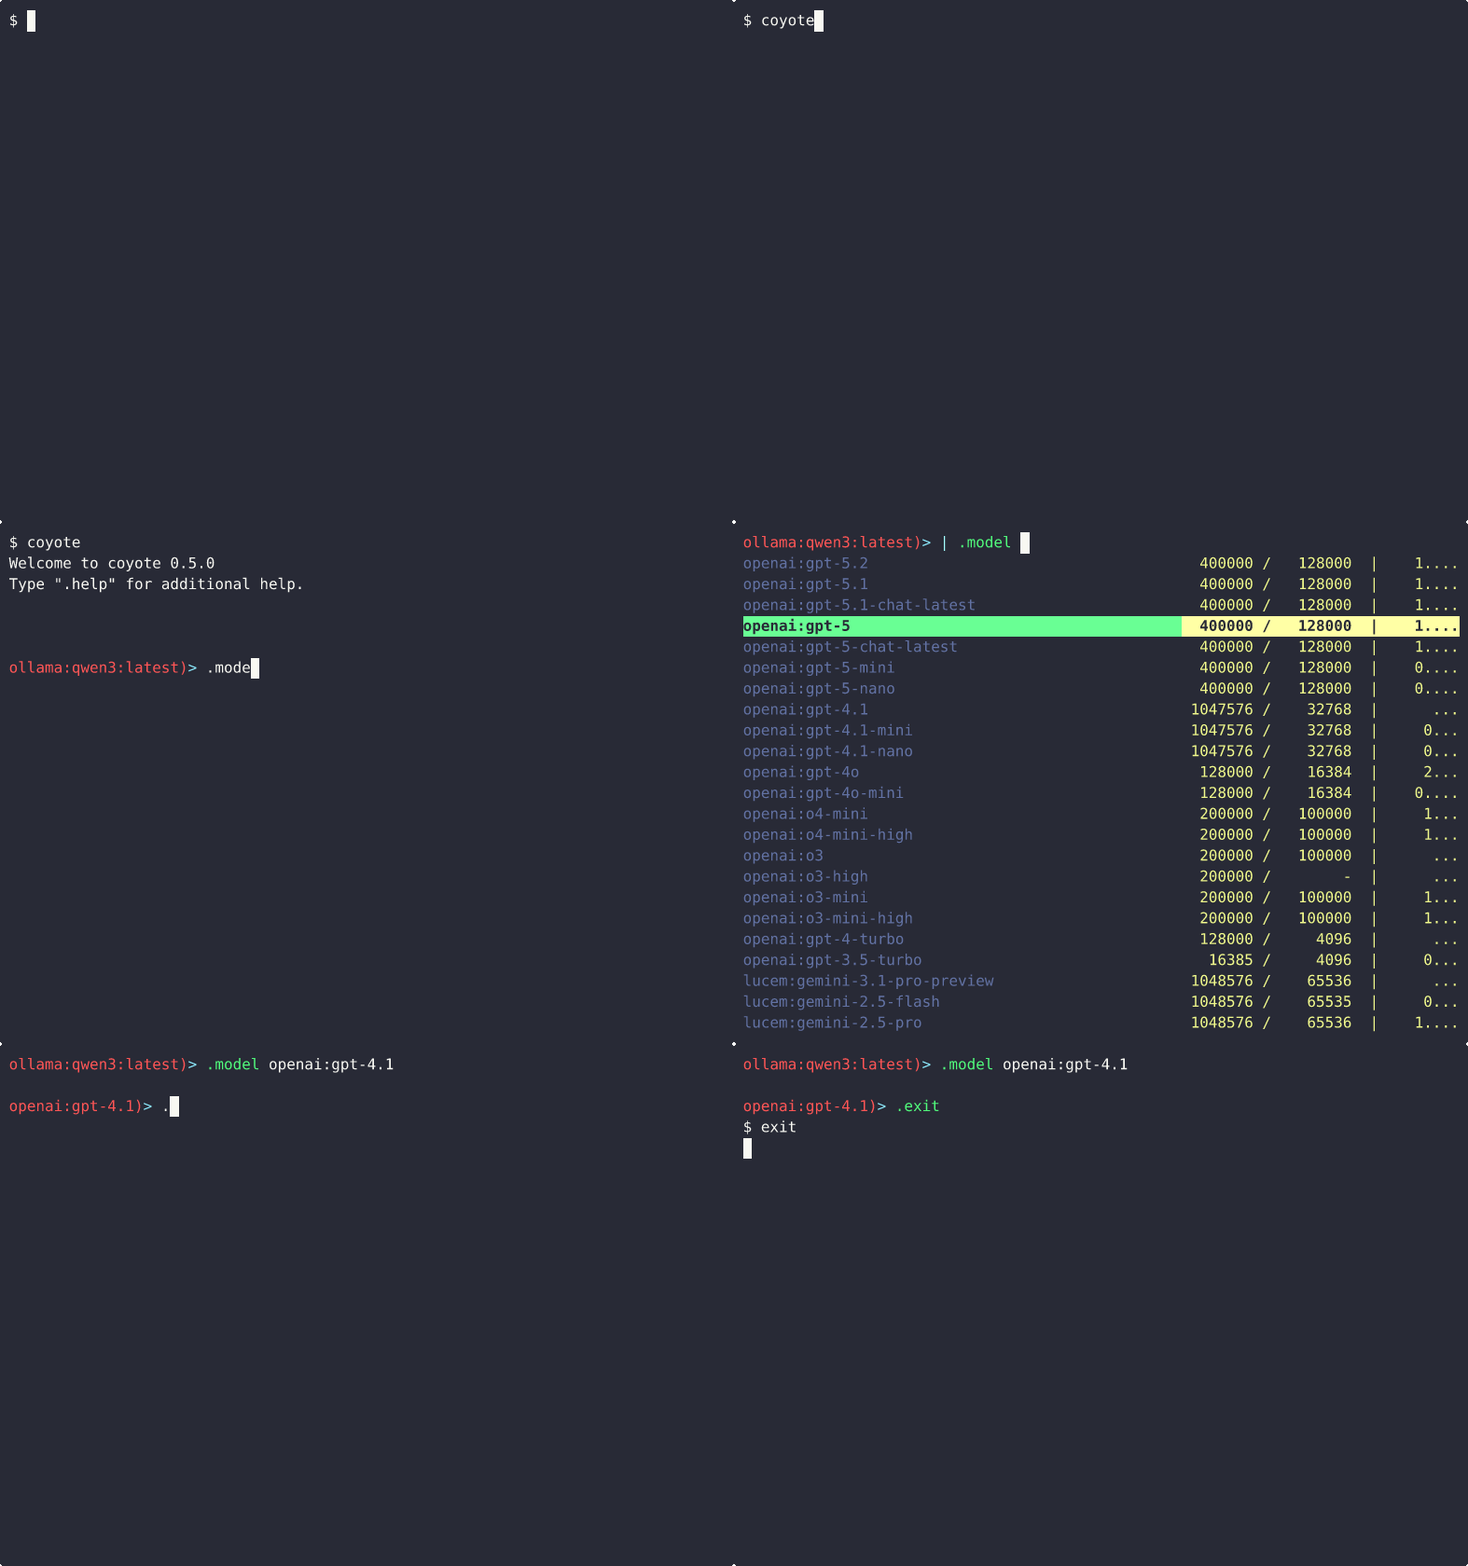
For more information about how to add models to Coyote, refer to the clients documentation.
.role - Role management
Coyote offers the following commands to manage your roles:
| Command | Description |
|---|---|
.role |
Create or switch to a role |
.info role |
Show information about the active role |
.edit role |
Open the active role's configuration file in your preferred text editor |
.save role |
Save the active role and its configurations to a configuration file |
.exit role |
Exit the active role |
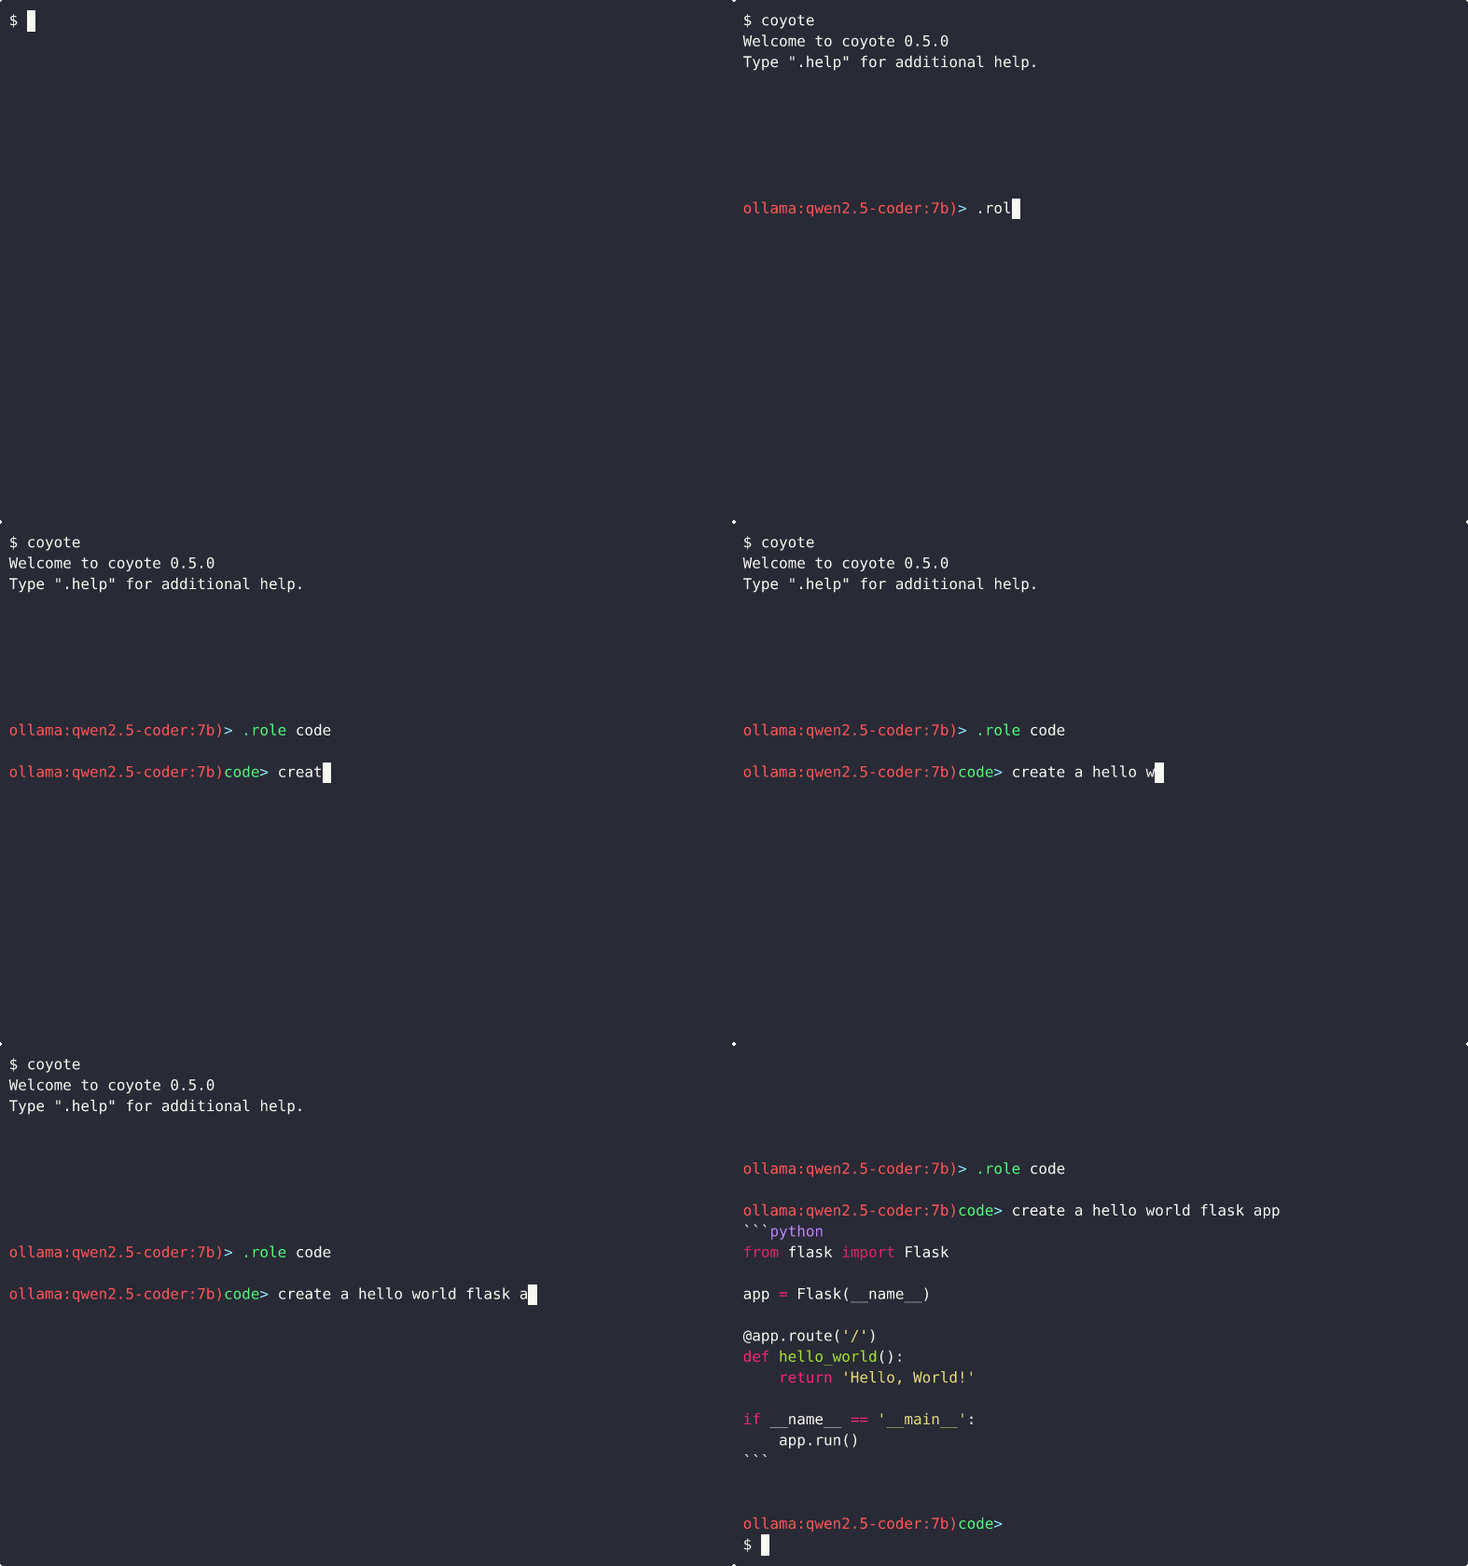
For more information about roles in Coyote and how to build them, refer to the roles documentation.
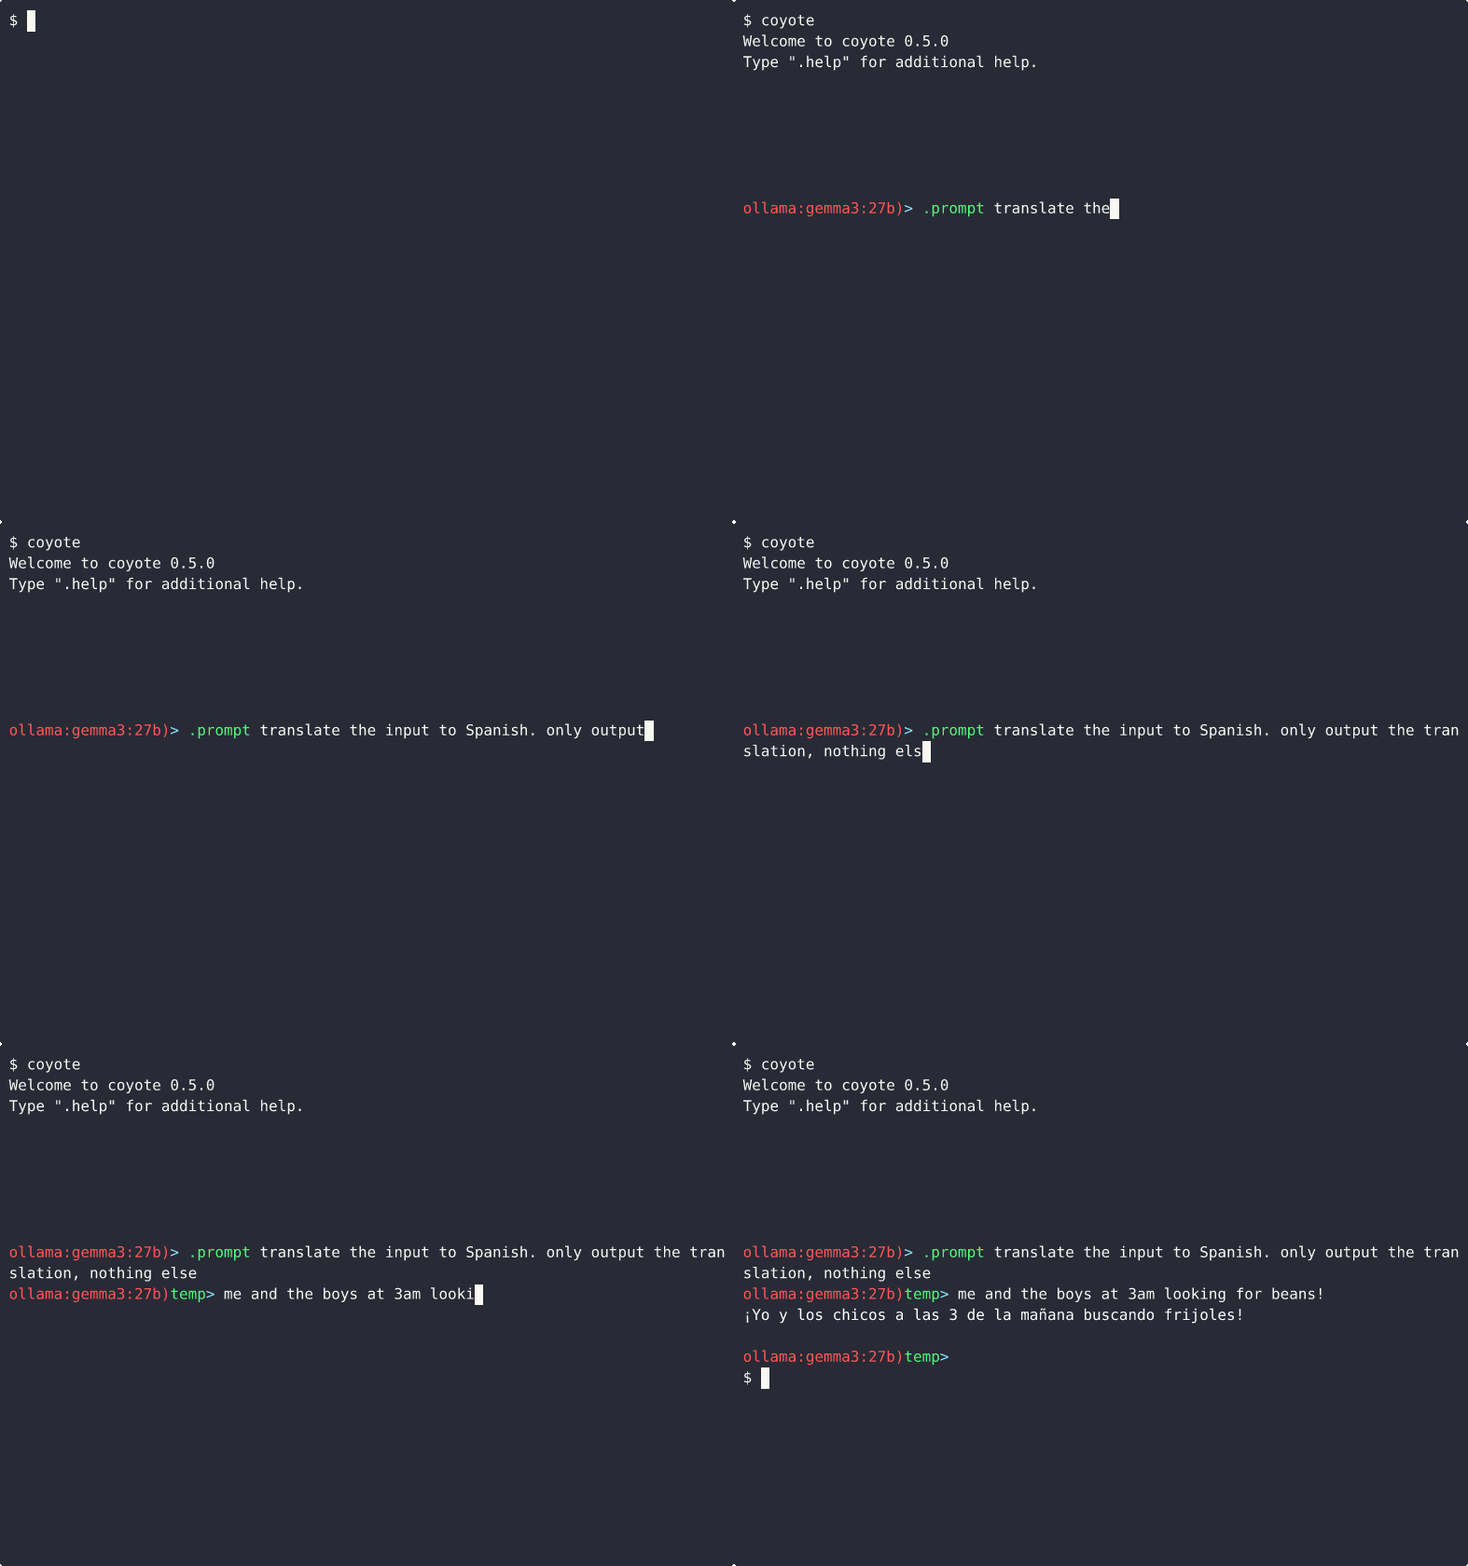
.temp-role - Set a temporary role using a prompt
If you need to create a temporary role that you want to discard after use, you use .temp-role. .temp-role-based
roles cannot be persisted to a file and saved.
Renamed from
.prompt: this command used to be called.prompt. That name now invokes MCP server prompts (see.promptbelow). If you have muscle memory or macros built around.prompt <text>, update them to.temp-role <text>. The CLI flag followed the same rename: use--temp-role <text>(the old--promptflag is unbound and rejected).
.prompt - Invoke an MCP server prompt
MCP servers can expose prompts: named, parameterized message templates that are rendered
server-side, so the server can embed live data the client never sees. .prompt invokes one and submits the rendered
result as your chat input:
.prompt <server> <name> [key=value ...]
For example:
.prompt github summarize_pr repo=coyote number=42
- Arguments are named, matching the prompt's declared argument names (MCP prompt arguments have no positional
order). Values containing spaces can be quoted:
key="some value". - Missing required arguments are prompted for interactively, one at a time, before the prompt is fetched.
- The result is submitted as your chat input, exactly as if you had typed it. Multi-message prompts are flattened
into a single user message with
[user]/[assistant]labels marking each original message's role. The flattened text is never parsed as a REPL command or shell line, so prompt content beginning with.or!is chatted verbatim, not executed. - Authentication errors surface here. If the server's token has expired (or it was never authenticated),
.promptreports the auth-required error the same waymcp_invokedoes; run.mcp auth <server>to recover.
Discover available prompts with .list prompts, which prints a server / name / description / args table across
all enabled servers.
Tab completion is staged and queries the running MCP servers live on every TAB press (bounded by a 2-second timeout per query):
| Input | Suggestions |
|---|---|
.prompt <TAB> |
Enabled, running servers that advertise the prompts capability |
.prompt <server> <TAB> |
That server's prompt names, with descriptions |
.prompt <server> <name> <TAB> |
key= suggestions for the prompt's arguments, with required ones marked; keys you've already typed are excluded |
An empty completion list is silent by design: it means the server is not running or authenticated, or has no
prompts, and is not a bug. Completion never starts a server and never triggers an authentication flow; an
enabled-but-unauthenticated (or stopped) server simply shows nothing at TAB. Auth recovery happens at invocation,
where .prompt surfaces the actual error.
Macro shadowing: built-in commands win name collisions, so a user macro named
promptis shadowed by this command..list macrosmarks itshadowed (built-in), and you can still run it explicitly with.macro prompt [args...].
.skill - Skill management
Skills are modular knowledge or capability packs the LLM can load and unload mid-conversation. Multiple skills can be loaded at once; their instructions stack and their tools/MCP servers union with the active role/agent/session.
Requires function calling. Skills depend on Coyote's function calling system. If
function_calling_support: falsein your global config, the.skill loadand.skill unloadcommands refuse, and the model cannot load skills itself.
| Command | Description |
|---|---|
.skill loaded |
List currently-loaded skills in this session |
.skill load <name> |
Load a skill into the current context (validates policy + compatibility, then refreshes scope) |
.skill unload <name> |
Unload a loaded skill, releasing any MCP servers it pulled in |
.skill <name> |
Open the skill in $EDITOR. Creates a scaffolded SKILL.md if missing |
To edit an existing skill without the create-if-missing fallback, use .edit skill <name> (see the .edit section).
For more information about skills, including frontmatter fields, visibility/enforcement, auto-unload behavior, and the bundled built-in skills, see the skills documentation.
.session - Session management
Use the following commands to manage sessions in Coyote:
| Command | Description |
|---|---|
.session |
Start or switch to a session |
.empty session |
Clear all messages for the active session |
.undo |
Remove the last exchange from the session and restore your prompt for editing |
.compress session |
Compress the session messages using the summarization_prompt setting in the global config |
.info session |
Display information about the active session |
.edit session |
Open the active session's configuration in your preferred text editor |
.save session |
Save the active session to a session configuration file |
.fork |
Fork the active session into a new named copy (.fork [name]) |
.exit session |
Exit the active session |
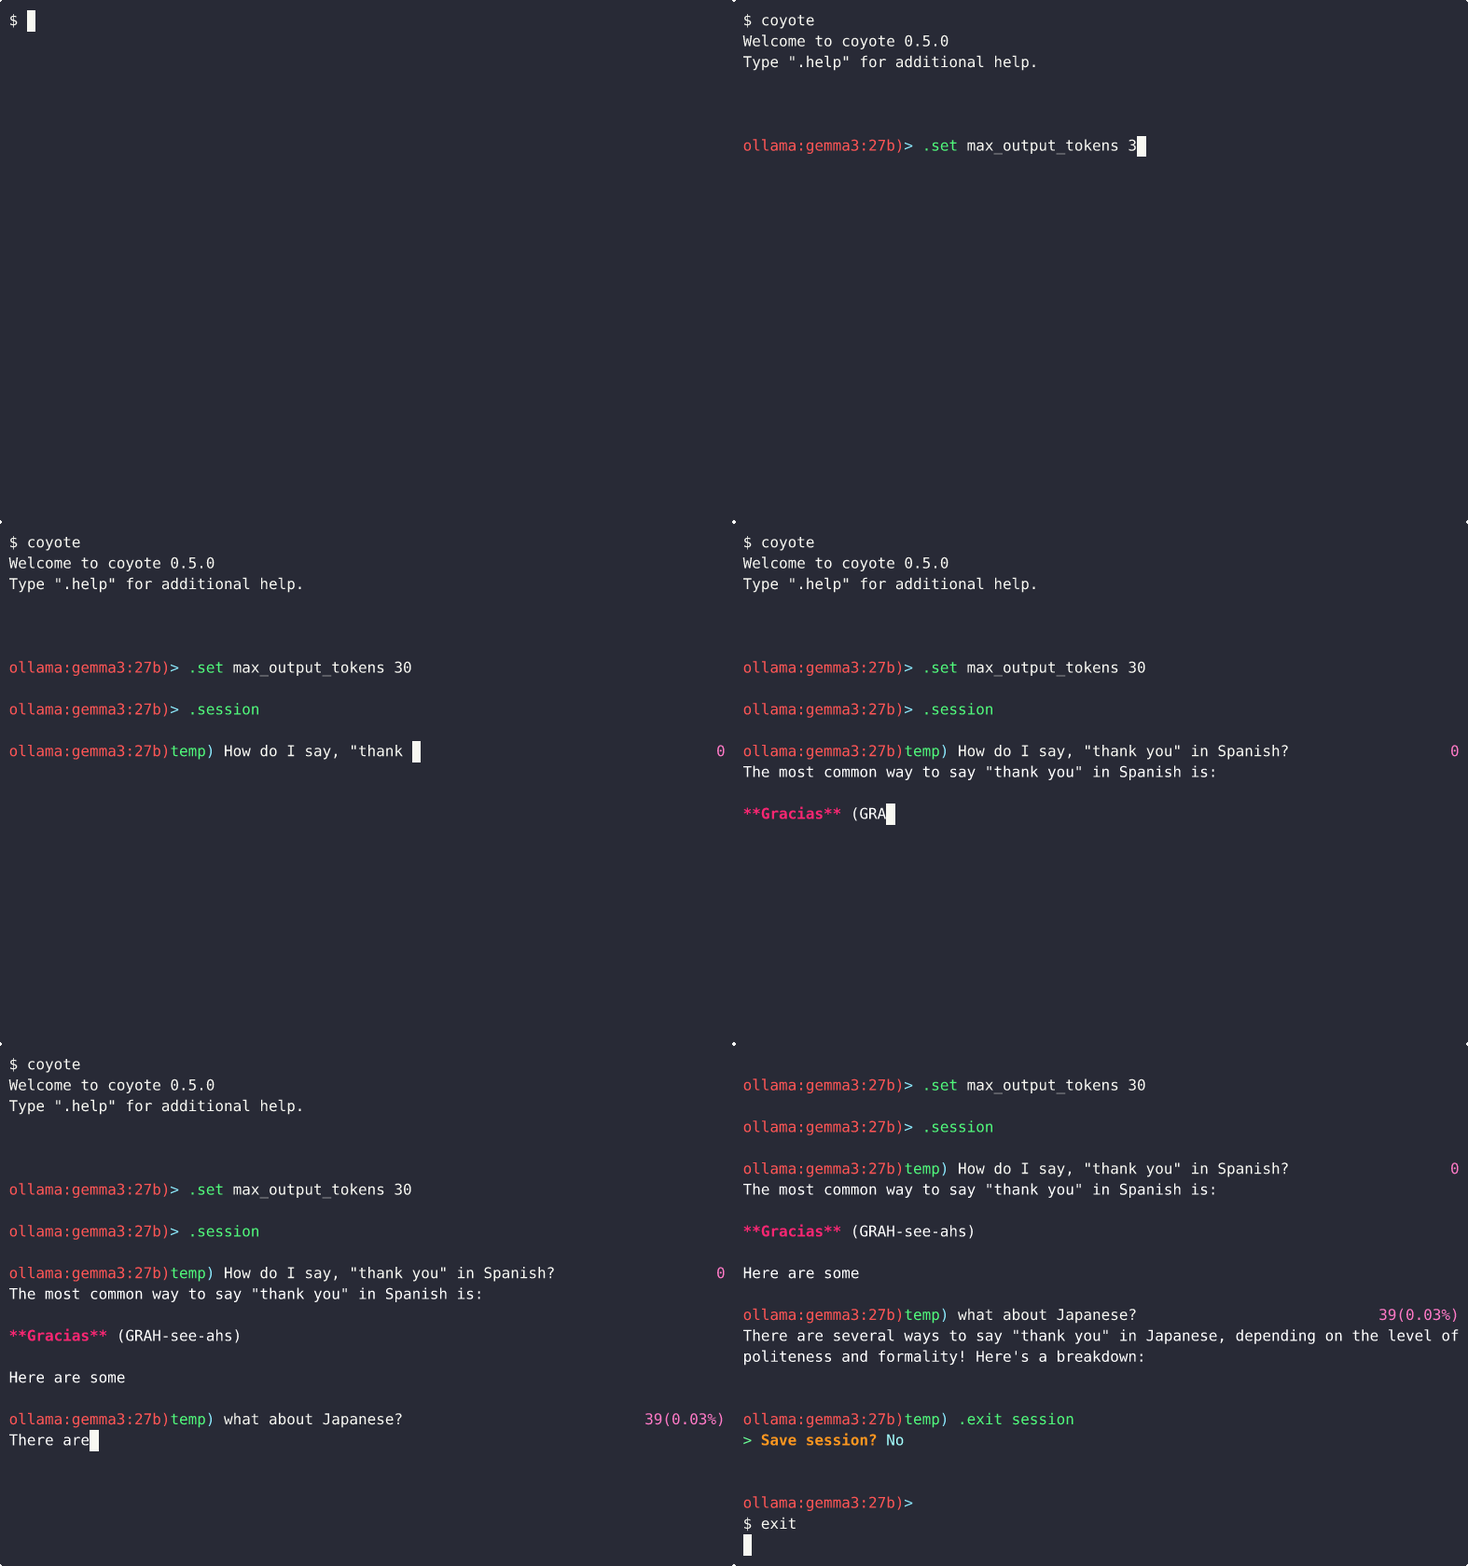
For more information on sessions and how to use them in Coyote, refer to the sessions documentation.
.agent - Chat with an AI agent
Coyote lets you build OpenAI GPT-style agents. The following commands let you interact with and manage your agents in Coyote:
| Command | Description |
|---|---|
.agent |
Use an agent |
.starter |
Display and use conversation starters for the active agent |
.clear todo |
Clear the todo list and stop auto-continuation (requires auto_continue: true on the agent) |
.edit agent-config |
Open the agent configuration in your preferred text editor |
.info agent |
Display information about the active agent |
.exit agent |
Leave the active agent |

For more information on agents in Coyote and how to create them, refer to the agents documentation.
.clear todo - Clear the todo list
Clears the todo list and stops auto-continuation. This command is available in any context (agents, sessions,
roles, or bare mode) as long as auto_continue is enabled.
This is useful when:
- You gave a custom response that changes or cancels the current task
- The model is stuck in auto-continuation with stale todos
- You want to start fresh
For more information, see the Todo System documentation.
.rag - Chat with documents
RAG (Retrieval Augmented Generation) enables you to load documents into the LLM so you can ask questions about it or complete tasks using the documents as additional context.
| Command | Description |
|---|---|
.rag |
Initialize or access a RAG |
.rag attach <name> |
Attach a RAG to an existing remote Qdrant collection (read-only) |
.edit rag-docs |
Add or remove documents from the active RAG using your preferred text editor |
.rebuild rag |
Rebuild the active RAG from scratch, re-embedding every document |
.sources rag |
Show a works-cited of the sources used in the last query |
.info rag |
Display information about the active RAG |
.exit rag |
Exit the active RAG |
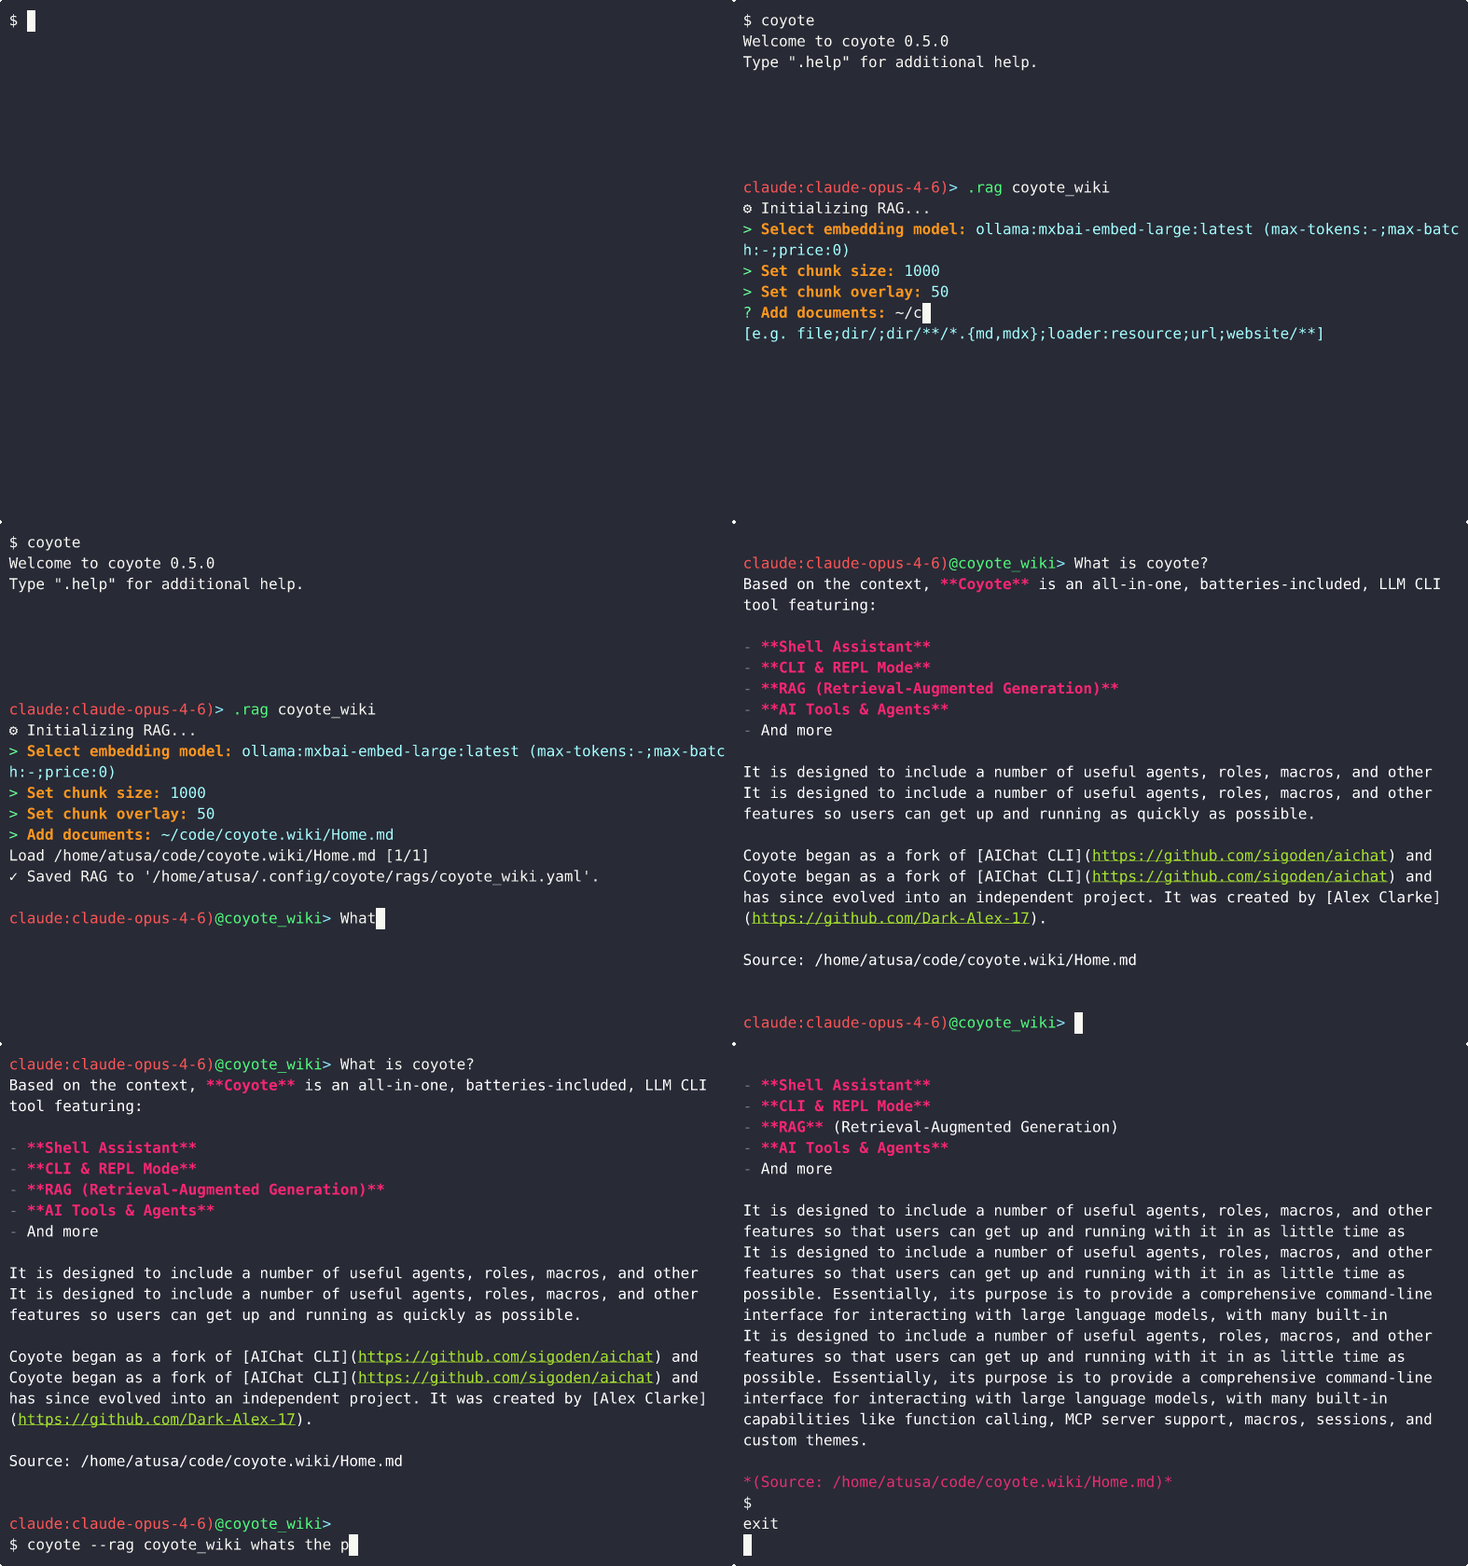
For more information about RAG in Coyote and how to utilize it, refer to the rag documentation.
.macro - Execute or manage a macro
Macros in Coyote are like "scripts" of commands and they double as Coyote's custom commands: any enabled macro can
be invoked directly as a top-level command (.my-macro args), with tab completion alongside the built-ins. By default
macros run in isolated environments (they don't use any active settings and can't affect your current context), but a
macro can opt onto your live context with isolated: false in its definition.
| Command | Description |
|---|---|
.<name> [args...] |
Run an enabled macro as a top-level custom command (built-in commands win name collisions) |
.macro <name> [args...] |
Run a macro explicitly; also works for macros shadowed by a built-in command's name |
.macro <name> |
If <name> doesn't exist, starts the interactive macro creator |
.macro enable <name> |
Add a single macro to the global enabled list |
.macro disable <name> |
Remove a single macro from the global enabled list |
Availability is scoped with enabled_macros (global/role/agent/session, most-specific wins) and macros can also be
loaded per-project from .coyote/macros/ in the working directory. .list macros shows every macro's source, isolation,
and state.
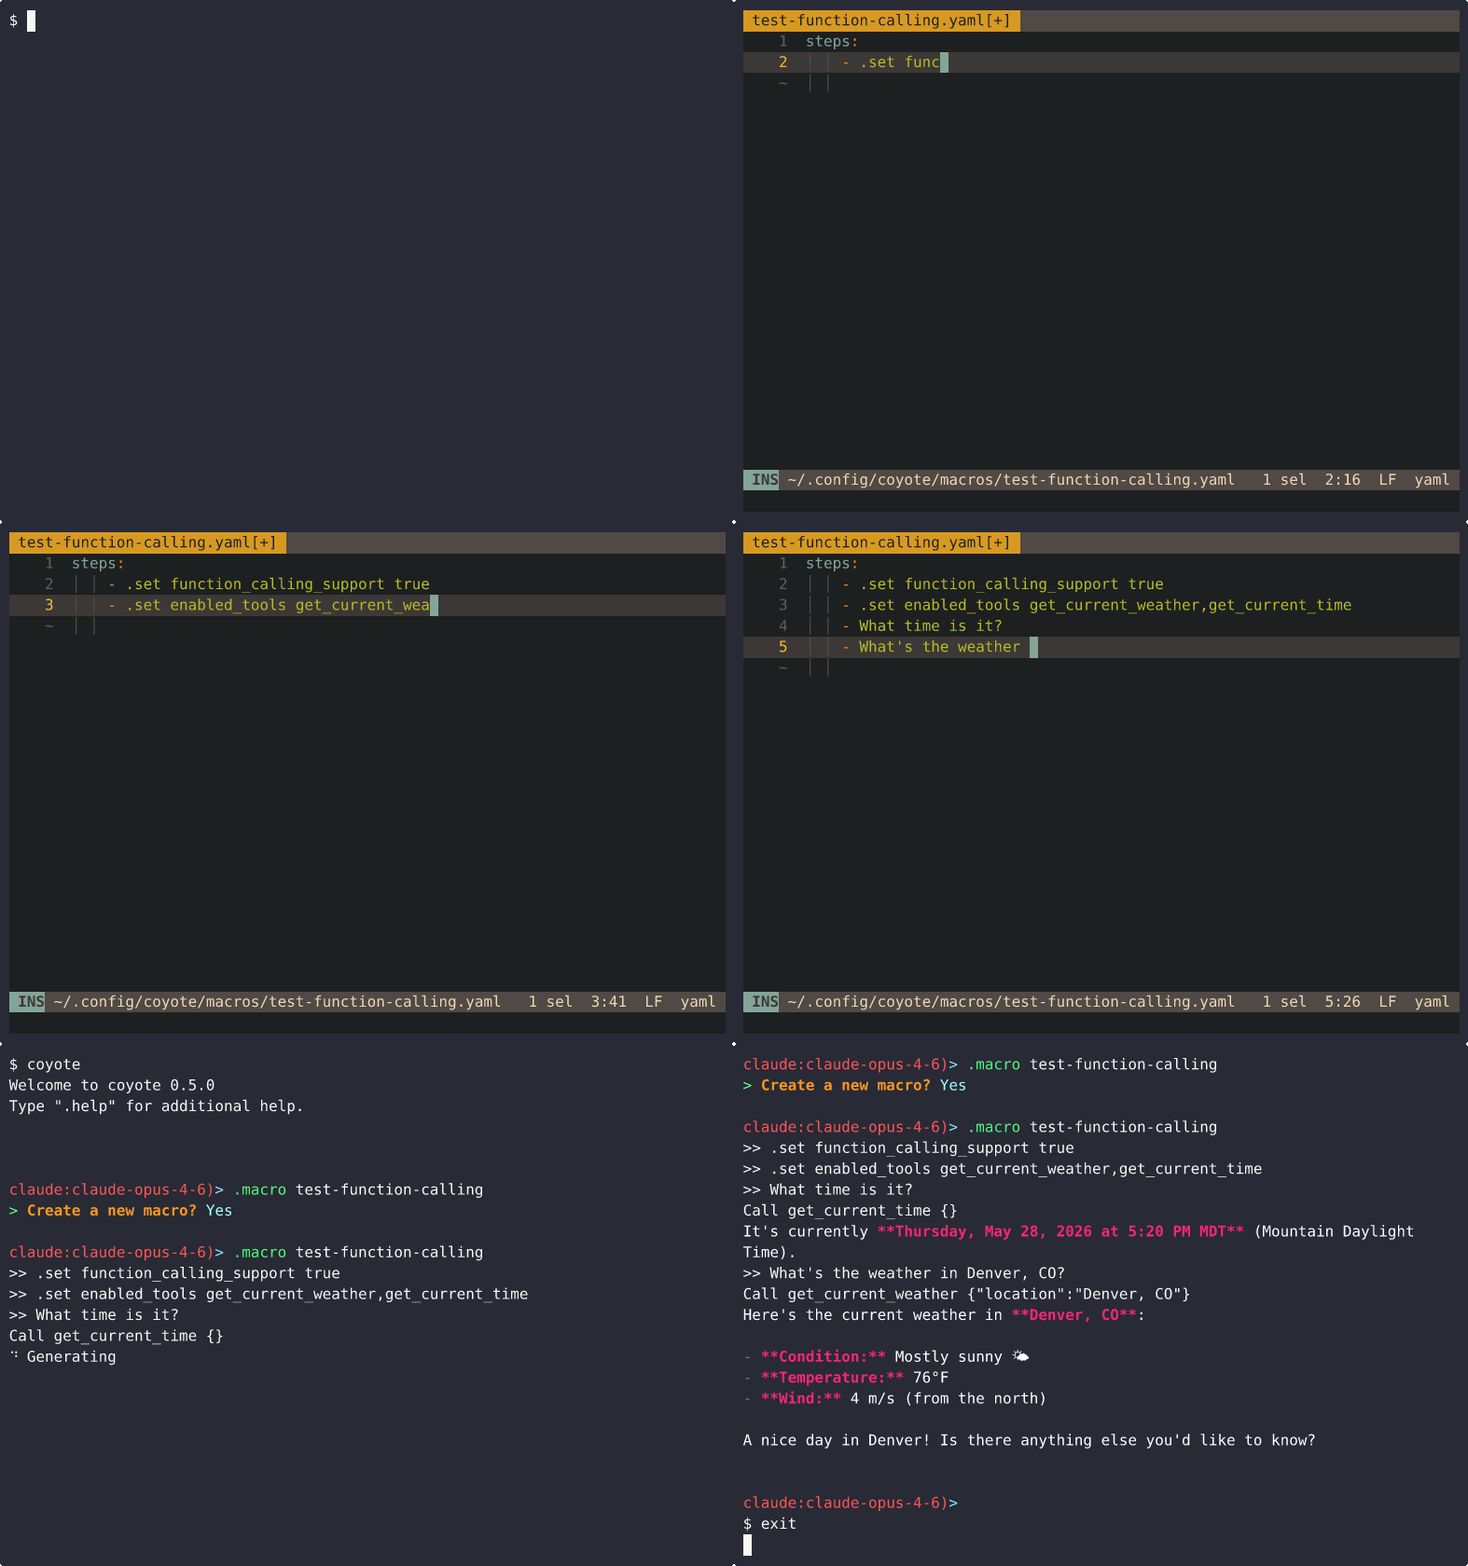
For more information on macros in Coyote and how to create them, refer to the macros documentation.
.file - Read files and use them as input
Coyote lets you specify any number of documents that you can load and use as ephemeral RAG to chat with the LLM. To see
what files or values you can pass to it, simply run the command .file with no arguments:
openai:gpt-4o)> .file
Usage: .file <file|dir|url|%%|cmd>... [-- <text>...]
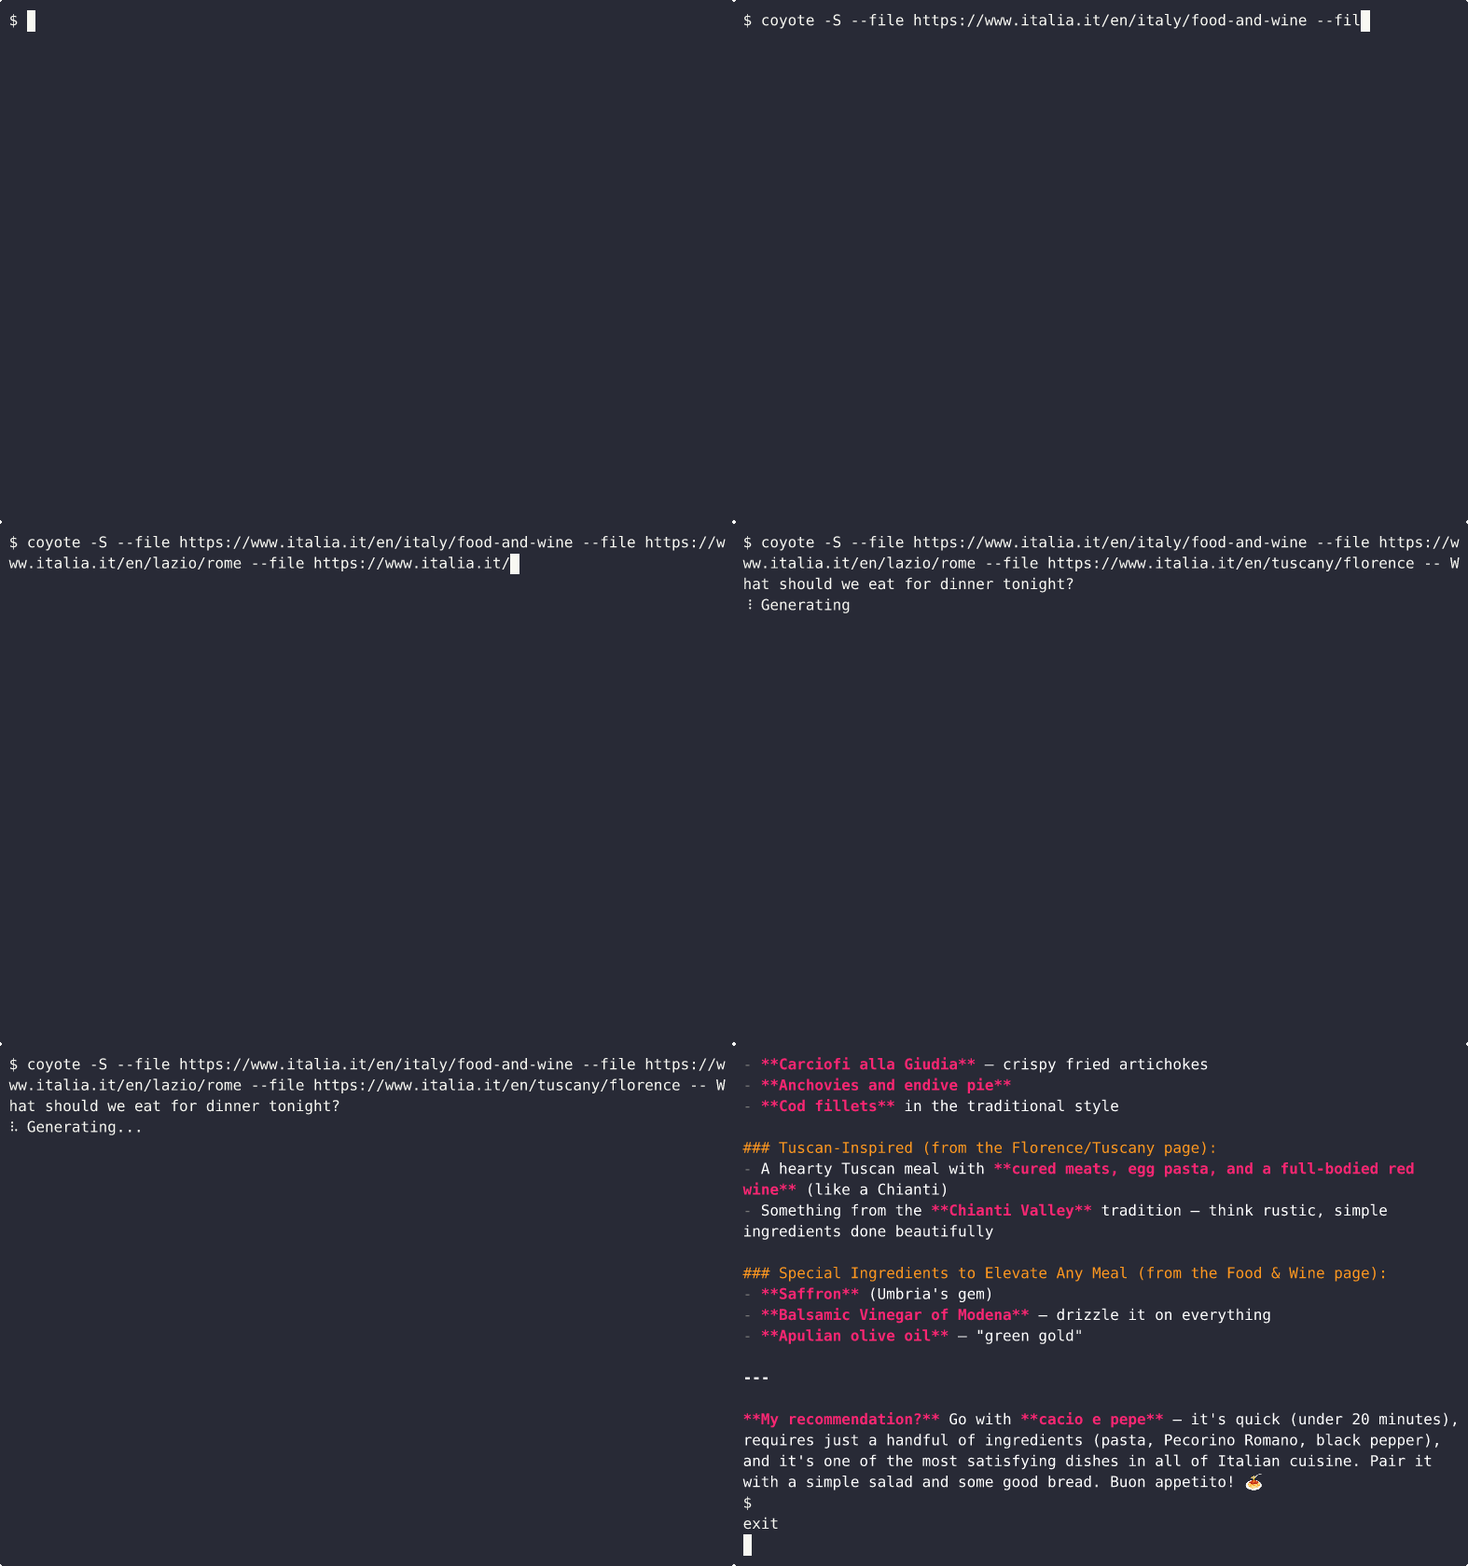
For more information about ephemeral RAG, refer to the ephemeral RAG documentation.
.vault - Manage the Coyote vault
The Coyote vault lets users store sensitive secrets and credentials securely so that there's no plaintext secrets anywhere in your configurations.
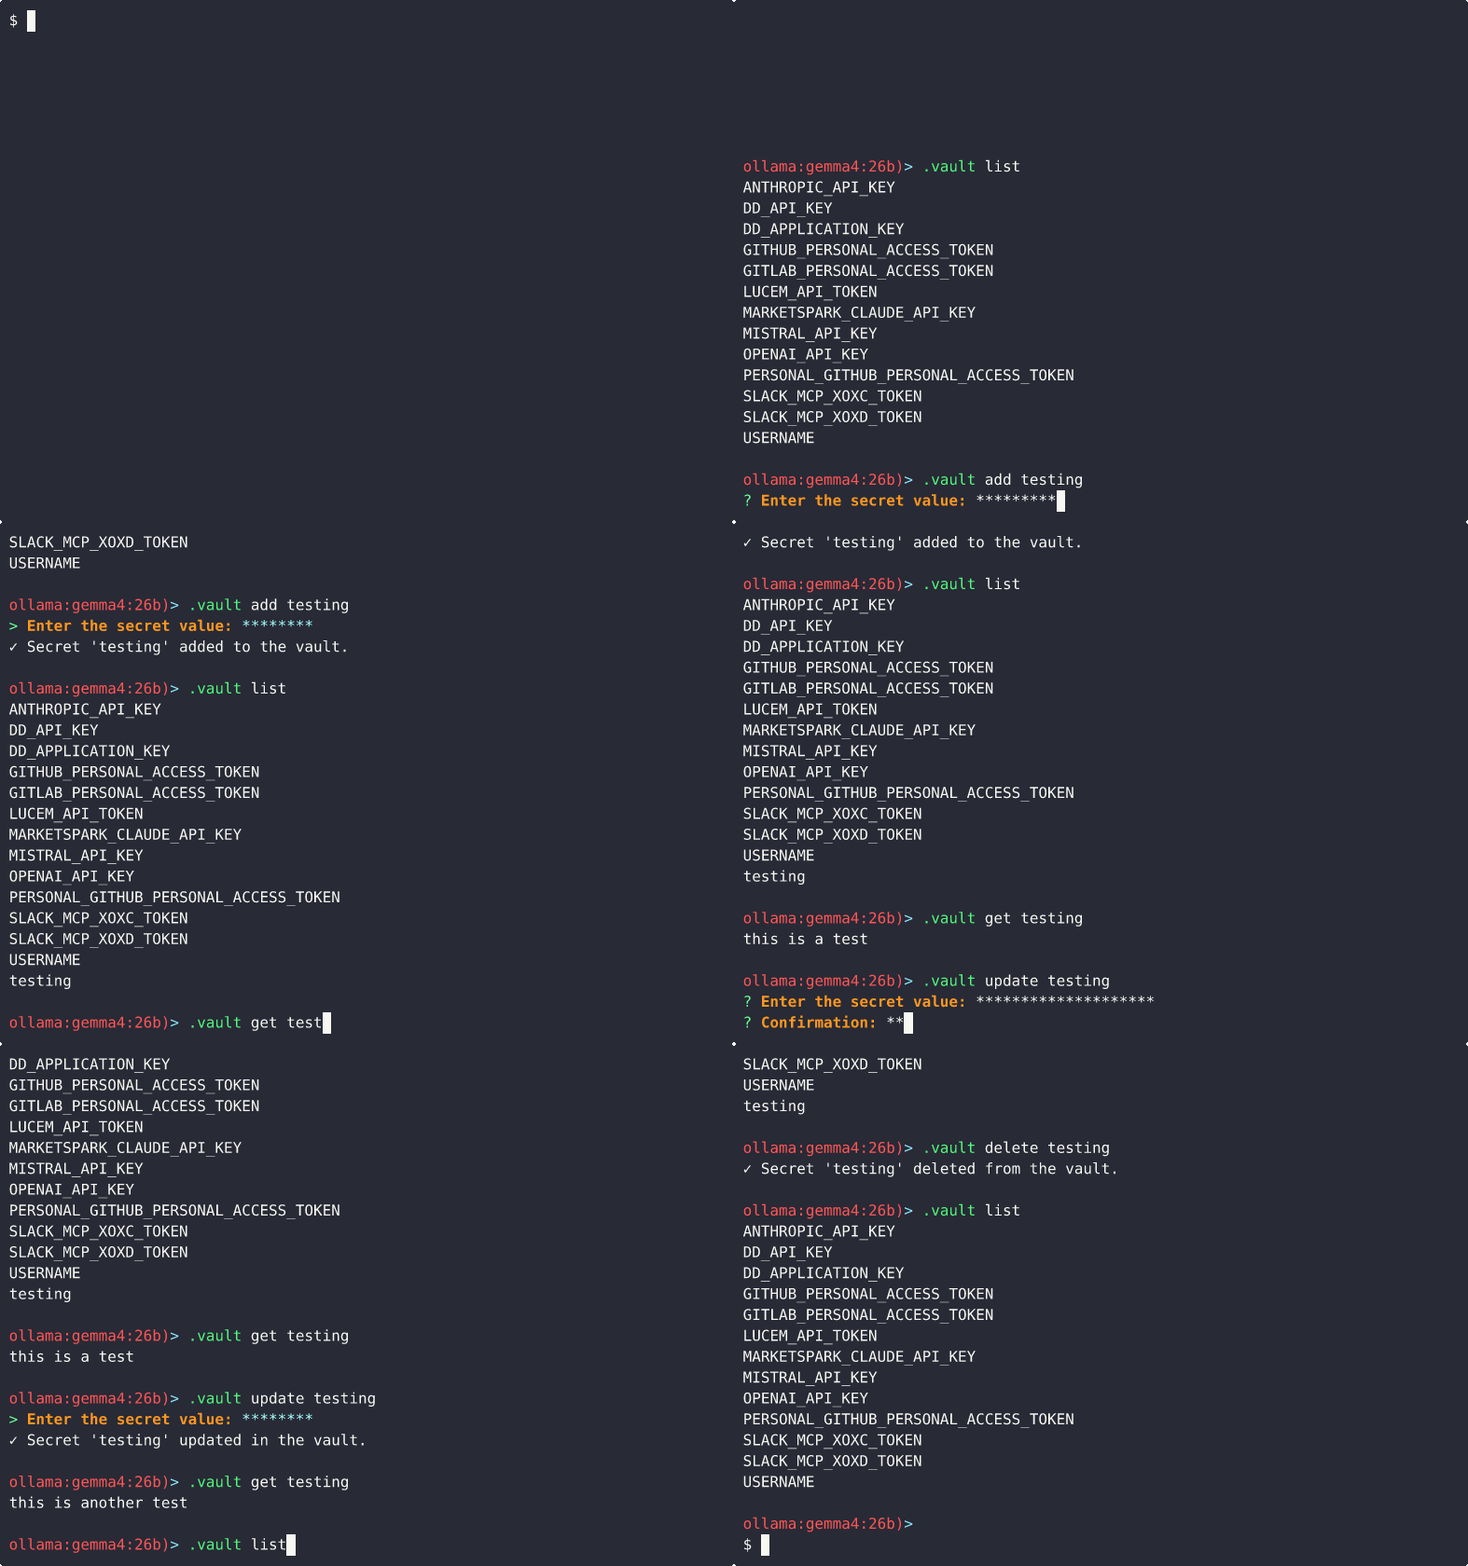
For more information about the Coyote vault, refer to the vault documentation.
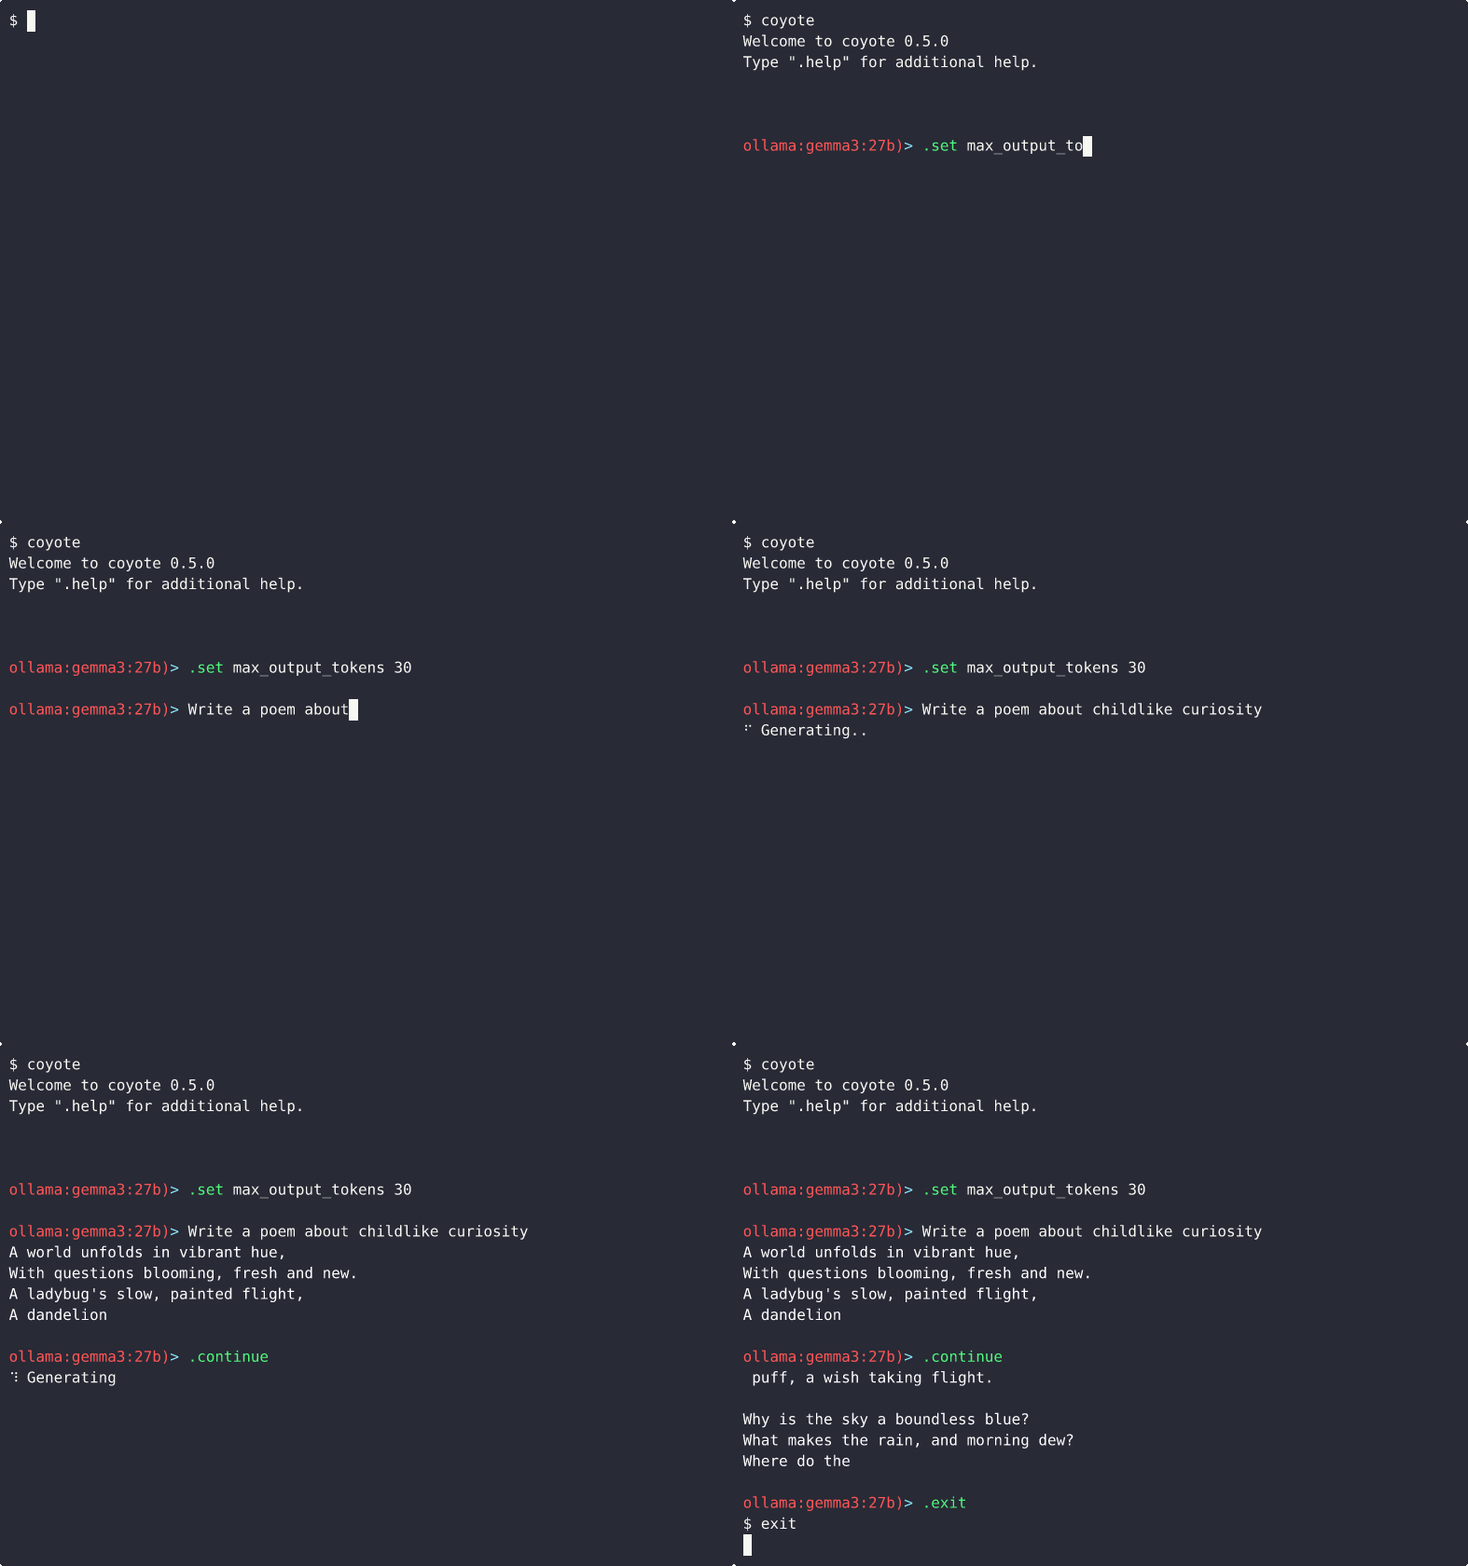
.continue - Continue the previous response
When you have a response that exceeds the context length, you can use the .continue command to continue the generation
of the last response.
.recover - Recover from an interrupted agentic session
When a long-running agentic session is interrupted for one reason or another, e.g. by an API error (rate limits,
network failures, token exhaustion, etc.) or a Ctrl+C during generation, Coyote checkpoints the session state
at the point of failure. .recover lets you resume from that checkpoint without losing the tool calls and
context accumulated before the error:
.recover [message]
If you don't provide a message, Coyote sends "Please continue from where you left off." The model receives the full
session history up to the interruption, including all completed tool calls and their results, followed by your
recovery message, and continues from there.
Requires an active session. .recover is only available when a session is open. Without a session, interrupted
context is not preserved and there is nothing to recover from.
See Error Recovery in the sessions documentation for more detail.
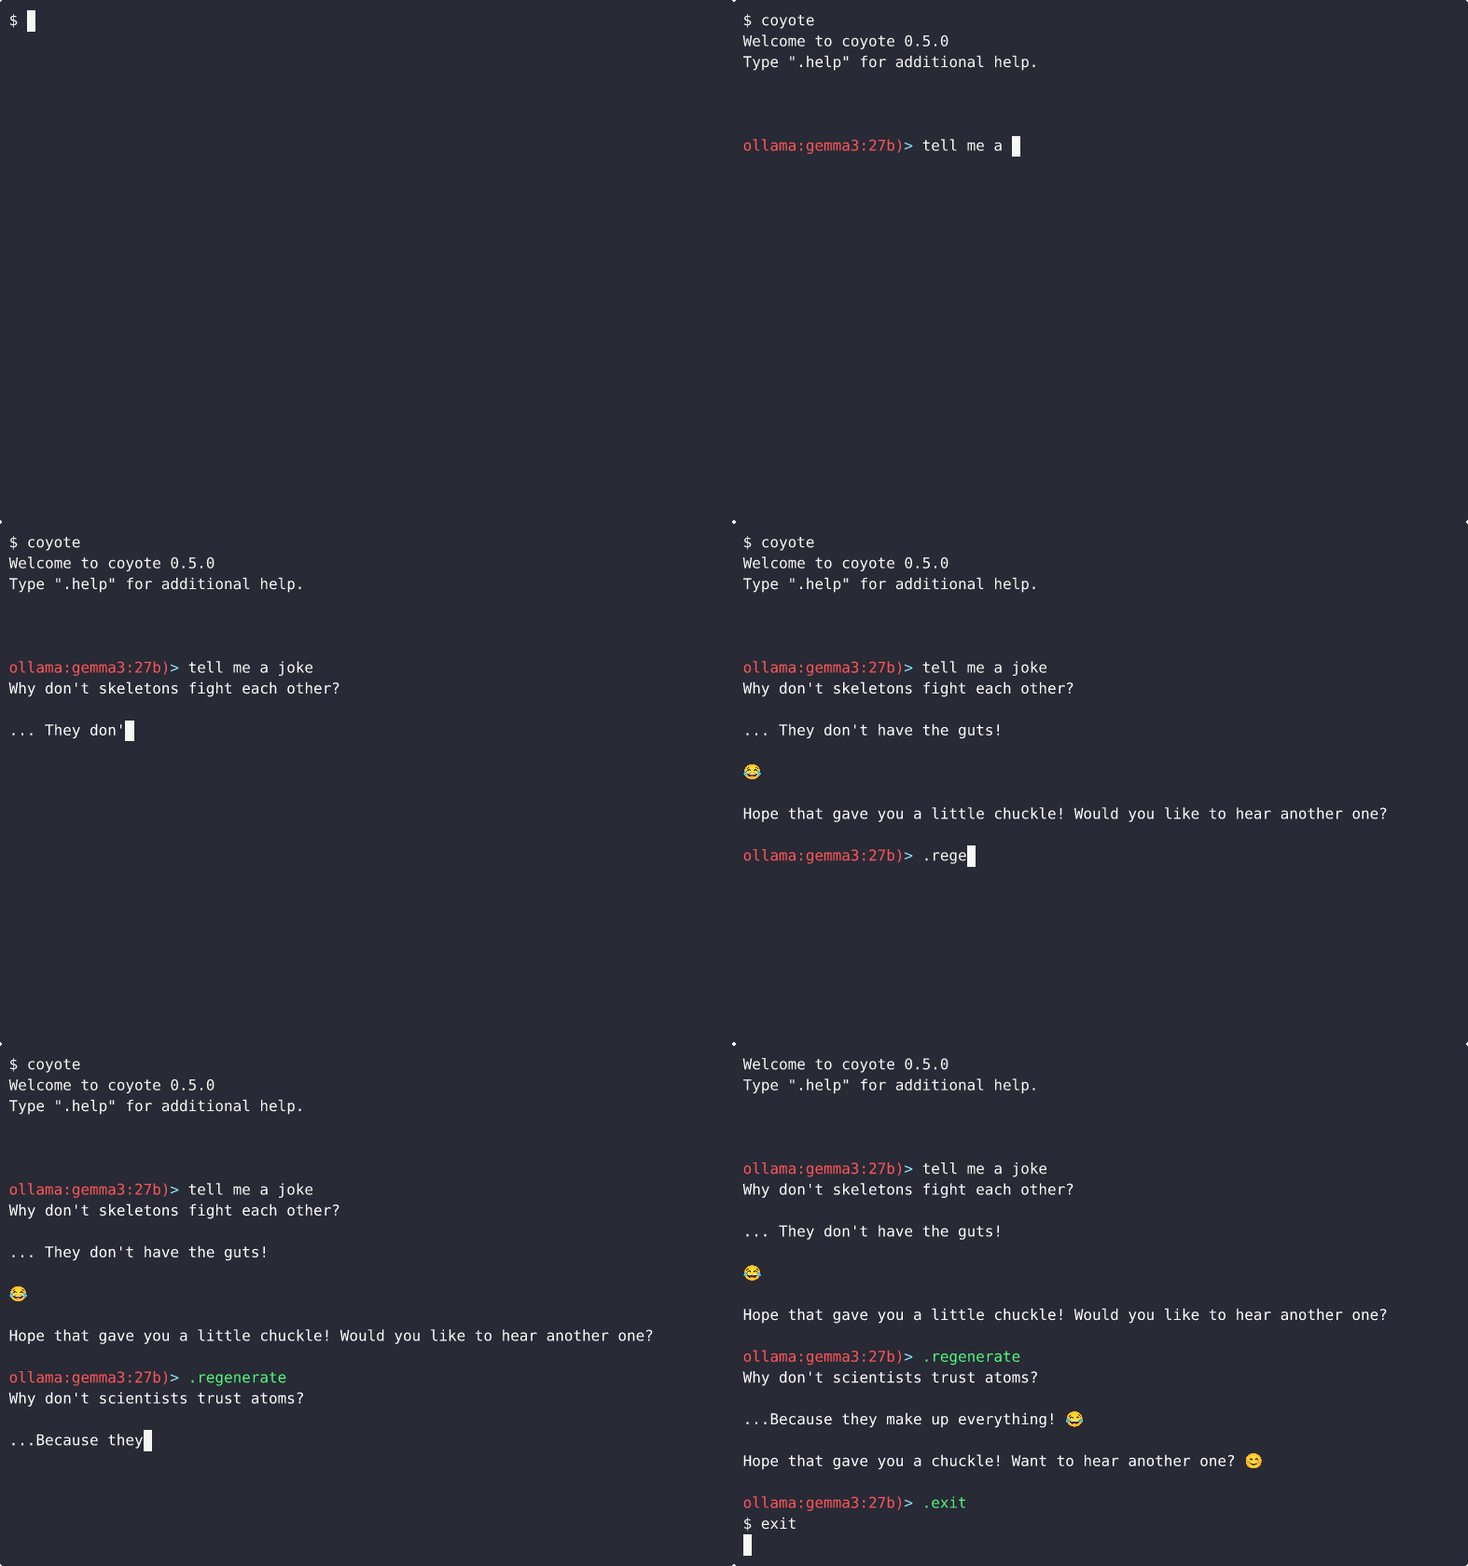
.regenerate - Regenerate the last response
If ever your response is interrupted, or you want to try generating it again, you can use the .regenerate command to do
this without having to retype your query:
.undo - Undo the last exchange
Removes the last user prompt and LLM response from the active session and restores the original prompt text directly into the input buffer, ready for editing or re-sending.
.undo
Calling .undo multiple times walks backward through the conversation history one exchange at a time. It errors
with "Nothing to undo" once the session has no more messages to remove.
Requires an active session.
.undois only available when a session is open. Outside a session, conversation history is not tracked in memory, so there is nothing to walk back.
Discarding an interrupted response: If you pressed Ctrl+C during a streaming response (see Mid-Stream Interruption), the partial response was saved to the session. Use
.undoto remove it and restore your original prompt if you want to start fresh rather than continue from the partial output.
Note that .undo only modifies the in-memory session state. The append-only messages.md log is not affected.
If you save the session after undoing (via .save session or automatic save-on-exit), the saved file will reflect
the trimmed history.
Compressed sessions:
.undocan only walk back through the uncompressed message tail. If the session has been compressed (via.compress sessionor automatic compression), exchanges that were folded into the compressed summary cannot be undone..undowill return "Nothing to undo" once the uncompressed tail is exhausted, even if compressed history exists. This is the same limitation as.regenerate.
Graph agents:
.undois not supported inside a graph-based agent. The graph manages its own state independently of the session message list, so modifying that list could corrupt the graph's execution state. Attempting.undofrom inside a graph agent will produce an error.
.reasoning - Set the reasoning effort level
For models that support configurable reasoning (such as gpt-5.6-sol, claude-opus-4-7, gemini-3-flash-preview,
etc.), you can control how much effort the model applies to each response:
.reasoning <level>
Tab completion shows only the levels supported by the currently active model. Common level sets:
| Provider / Model family | Supported levels |
|---|---|
| Anthropic (most models) | low, medium, high, max |
Anthropic (opus-4-7 and up) |
low, medium, high, xhigh, max |
| OpenAI o-series | low, medium, high |
OpenAI gpt-5.5 |
medium, high, xhigh |
OpenAI gpt-5.6-* |
none, low, medium, high, xhigh, max |
| Gemini 2.5+ | minimal, low, medium, high |
.reasoning <level> is equivalent to .set reasoning_effort <level>. To clear the override and return to the
model's default, run .set reasoning_effort null.
Note: Using
.reasoninginside a graph-based agent is not supported. Graph agents manage their own per-node model configuration and do not expose a top-level reasoning effort toggle.
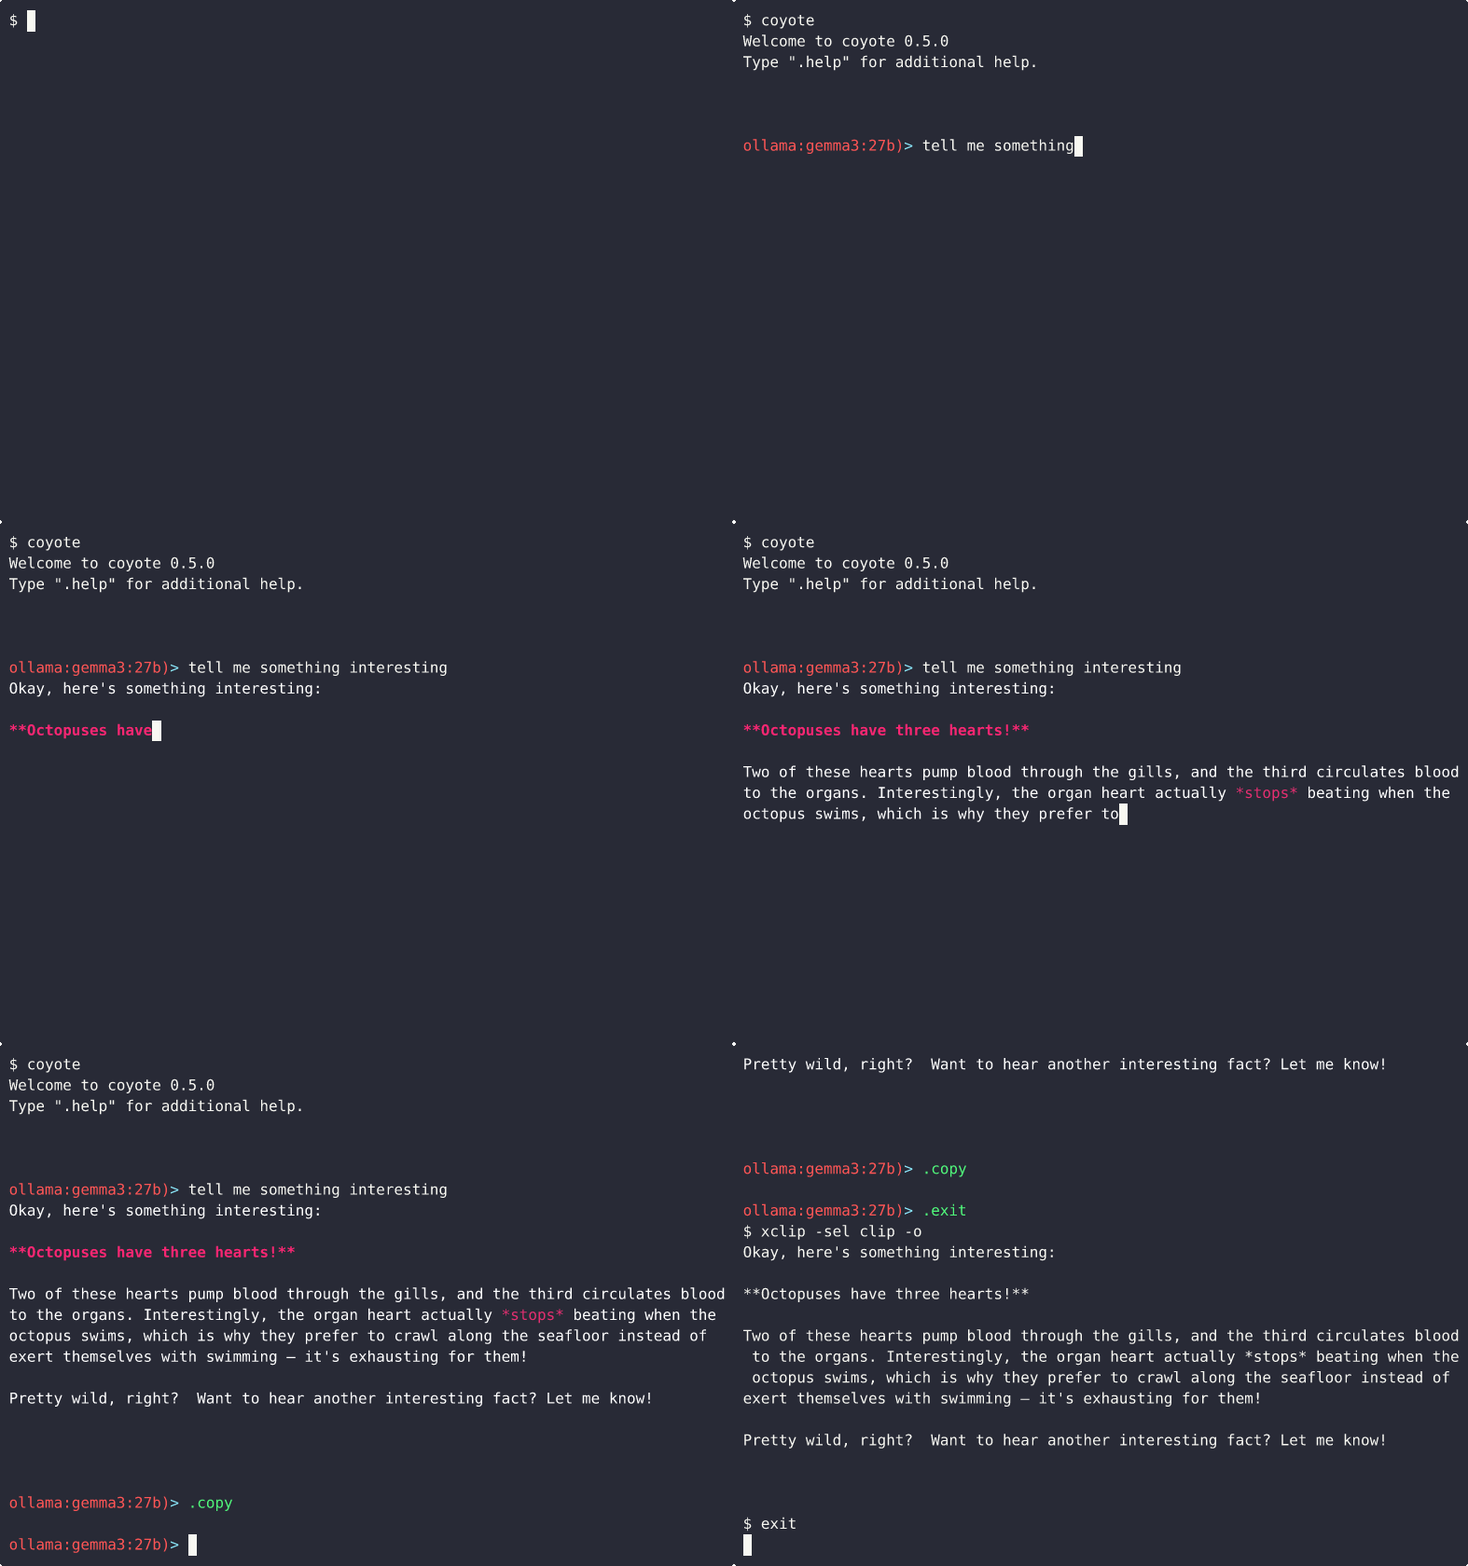
.copy - Copy the last response to your clipboard
If you're trying to copy the last response (like copying some code), you can use the .copy command to copy the entire
last response to your system clipboard:
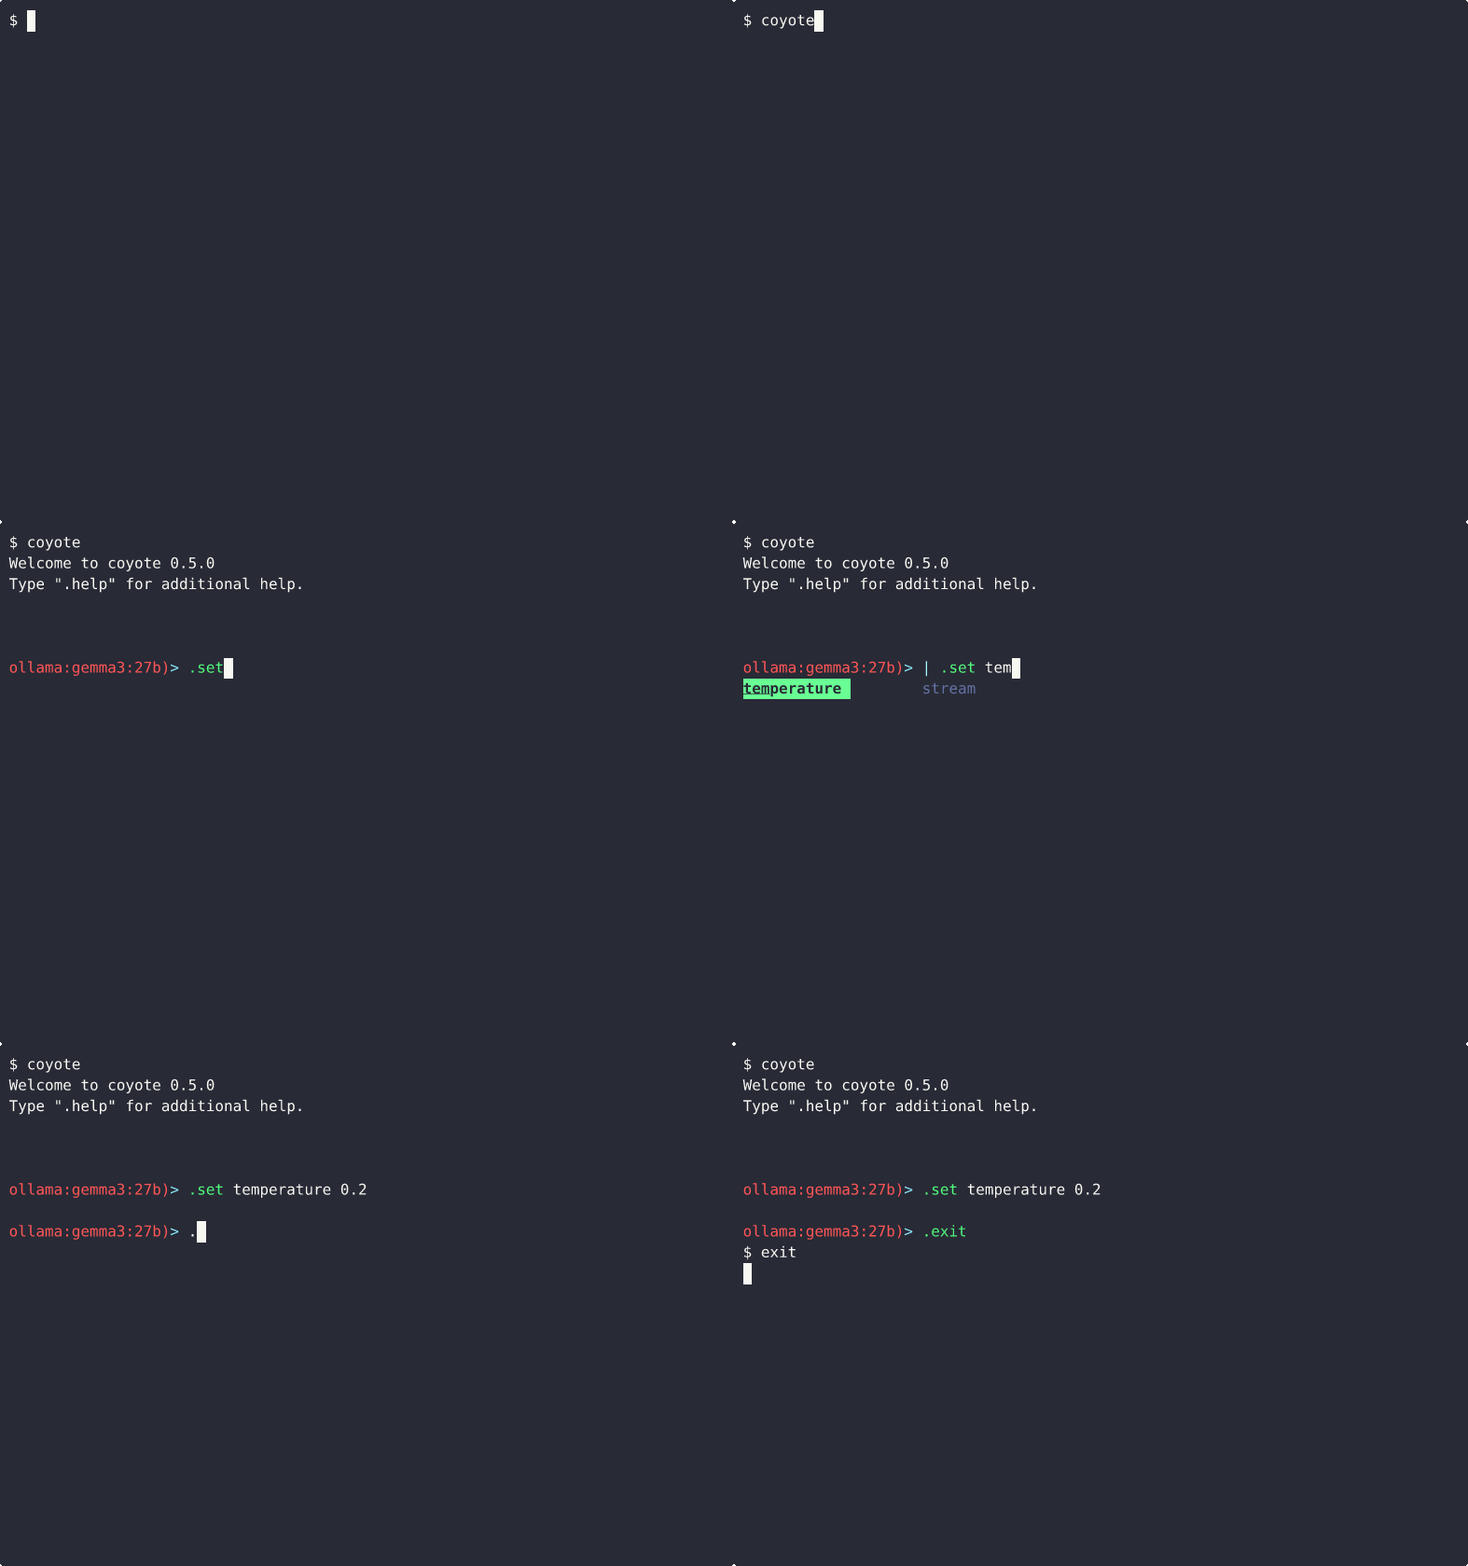
.set - Adjust runtime settings
You can use .set to adjust select settings at runtime. This is useful when you're experimenting with settings and want
to know how they'll affect Coyote. To persist the changes you make, be sure to update them in the global configuration
file.
The following settings can be adjusted at runtime:
| Setting | Type | Description |
|---|---|---|
auto_continue |
boolean | Enable/disable the Todo System auto-continuation |
max_auto_continues |
integer | Maximum number of automatic continuations |
inject_todo_instructions |
boolean | Inject default todo instructions into the system prompt |
continuation_prompt |
string | Custom continuation prompt (supports multi-word values; null to reset) |
temperature |
float | Model temperature parameter |
top_p |
float | Model top-p parameter |
reasoning_effort |
string | Reasoning effort level for models that support it (e.g. low, medium, high); supported levels vary by model; null to reset to the model's default |
enabled_tools |
string | Comma-separated list of enabled tools (e.g. fs_ls,fs_cat or all); the saved YAML config also accepts a list form |
enabled_mcp_servers |
string | Comma-separated list of enabled MCP servers (e.g. github,slack or all); the saved YAML config also accepts a list form |
mcp_tools.<server> |
string | Per-server MCP tool whitelist patterns, comma-separated (e.g. .set mcp_tools.github get_*,list_*); null removes that server's entry, and bare .set mcp_tools null clears the current layer's whole map |
enabled_skills |
string | Comma-separated list of enabled skills (e.g. git-master,ai-slop-remover); null clears the override |
enabled_macros |
string | Comma-separated list of enabled macros at the global level (e.g. standup,review-work); null clears the list, re-enabling all macros |
save_session |
boolean | Whether to auto-save sessions |
compression_threshold |
integer | Token threshold for session compression |
compression_keep_last |
integer | Number of recent messages kept visible after compression; 0 (default) compresses all messages |
max_tool_result_chars |
integer | Maximum characters from a single tool result forwarded to the model; 0 or omitted disables the cap |
max_output_tokens |
integer | Maximum output tokens for the current model |
dry_run |
boolean | Enable/disable dry run mode |
function_calling_support |
boolean | Enable/disable function calling |
mcp_server_support |
boolean | Enable/disable MCP server support |
skills_enabled |
boolean | Master switch for skills. Accepts true, false, or null (inside a session, null clears the session-level override; otherwise resets to the default true) |
stream |
boolean | Enable/disable streaming |
save |
boolean | Enable/disable saving responses |
highlight |
boolean | Enable/disable syntax highlighting |
raw_markdown |
boolean | When true, render markdown as raw text with syntax highlighting only. When false (default), the rich markdown renderer transforms syntax (headings, bold, lists, etc.) into styled terminal output |
.tool / .mcp enable|disable - Toggle a single tool or MCP server
Setting enabled_tools or enabled_mcp_servers via .set requires retyping the whole comma-separated list. The
.tool and .mcp toggles adjust one entry at a time instead:
| Command | Description |
|---|---|
.tool enable <name> |
Add a single tool to the enabled list in the current context |
.tool disable <name> |
Remove a single tool from the enabled list in the current context |
.mcp enable <server> |
Add a single MCP server to the enabled list and start it |
.mcp disable <server> |
Remove a single MCP server from the enabled list and stop it |
These write through the same layer cascade as .set (session > agent > role, else the global in-memory config), and the
confirmation message tells you which layer was written. Tab completion is state-aware: enable offers only entries
not currently enabled, disable offers only the current list.
Notes on edge cases:
- Entries enabled indirectly through a
mapping_tools/mapping_mcp_serversalias cannot be disabled individually; disable the alias or set the full list via.setinstead. - Disabling an MCP server that a loaded skill granted keeps it running until the skill is unloaded.
- In an agent context,
.tool enable/disableadjusts a runtime-only filter over the agent's tool pool. It is not part of the agent's configuration file, meaning agents always start with their full pool (own functions plusglobal_tools) and it can never enable a tool the agent didn't declare; names outside the agent's pool are rejected. While no filter is set the full pool is active, so enabling is a no-op and the first disable materializes the pool into a concrete list minus that tool. The filter is in-memory only and resets when the agent is reloaded. Graph agents are the exception: they define tools per-node viatools:ingraph.yaml, so.tooland.set enabled_toolsare rejected there. .mcp enable/disableis unavailable in agent contexts entirely; agent MCP servers are defined by the agent's own config (.edit agent-config).
.edit - Modify configuration files
The .edit command lets you modify configuration files for the current mode of the REPL. It will open the selected
configuration in your preferred text editor. It lets you modify the following configurations:
.edit config- Modify the global configuration.edit mcp-config- Modify the MCP servers configuration file (mcp.json).edit role- Modify the active role's configuration.edit session- Modify the active session's configuration.edit agent-config- Modify the active agent's configuration.edit rag-docs- Add or remove documents from the active RAG.edit skill <name>- Modify an existing skill by name
.delete - Delete configurations from Coyote
The .delete command allows you to delete entities in Coyote without having to directly run rm -rf on the configuration
directory or file corresponding to the target entity. You can use it to delete the following entities:
.delete role- Delete select roles.delete session- Delete select sessions.delete macro- Delete select macros.delete skill- Delete select skills.delete rag- Delete select RAGs.delete agent-data- Delete select agent's configurations and all tools
.list - List available assets
The .list command lists the assets of a given kind, making them discoverable without relying on tab completion:
| Command | Description |
|---|---|
.list roles |
List all roles (including built-ins) |
.list sessions |
List saved sessions for the current context |
.list agents |
List installed agents, with their descriptions when available |
.list rags |
List all RAGs |
.list macros |
List all macros |
.list bundles |
List installed bundles with their source, version, ref pin, and drift status (see Bundles) |
.list skills |
List skills available in this context, with descriptions and a (loaded) marker for active skills |
.list prompts |
List MCP prompts across all enabled servers (live listing), with each prompt's server, description, and arguments |
.list tools |
List the tools that can be enabled/disabled via .tool [enable|disable] <name> (excludes internal tools; in an agent context, lists the agent's tool pool) |
.list mcp-servers |
List the MCP servers that can be enabled/disabled via .mcp [enable|disable] <name> (configured servers plus mapping aliases); servers with an active tool whitelist are tagged [filtered] |
.list skills honors the same visibility and policy filters as the model-facing skill__list tool, so it shows exactly what the model can load in the current role/agent/session context.
.install - Reinstall bundled assets
Coyote's built-in agents, macros, and tool functions (and an MCP config template) are written to your configuration
directory on first run and are not overwritten afterward, so your local edits survive Coyote updates. The .install
command force-overwrites a category of bundled assets with the versions packaged in the current Coyote build. This is useful
when an update ships improved built-ins you want to adopt.
| Command | Description |
|---|---|
.install agents |
Reinstall the built-in agents |
.install macros |
Reinstall the built-in macros |
.install skills |
Reinstall the built-in skills |
.install functions |
Reinstall the built-in tool functions (leaves your mcp.json alone) |
.install mcp-config |
Merge new bundled MCP servers into mcp.json (existing servers are preserved) |
The same operation is available from the command line: coyote --install-builtins <category> (e.g.
coyote --install-builtins agents).
.install prompts for confirmation before overwriting anything. Assets you created yourself are never touched. Only
Coyote's own bundled assets are replaced.
.install mcp-config merges the bundled MCP server list into your existing mcp.json. Only servers not already
present in your file are added; your existing servers and any custom secret references are left untouched. This
behaves consistently with the other install categories, which also leave your own customizations alone.
.install <source> - Install and update bundles
Besides category names, .install accepts a git source or an installed bundle's name. It installs agents, roles,
skills, macros, tools, and MCP servers from any git repository whose layout mirrors Coyote's user config directory.
This is the primary mechanism for sharing and reusing Coyote configurations; an installed repo is tracked as a
bundle you can list, update, and uninstall.
| Command | Description |
|---|---|
.install <git-url> |
Install everything the repo provides |
.install <owner>/<repo> |
Shorthand; expands to https://github.com/<owner>/<repo> |
.install <owner>/<repo> --git-host <h> |
Expand the shorthand against a different git host |
.install <source>#<ref> |
Pin to a tag, branch, or commit (e.g. #v1.0.0, #main) |
.install <source> --filter <category> |
Restrict to one of agents, roles, skills, macros, functions, mcp-config |
.install <source> --force |
Skip all conflict prompts; overwrite local files unconditionally |
.install <bundle-name> |
Update an installed bundle from its recorded source |
The CLI equivalent is coyote --install <source-or-name> (with --git-host, --filter, and --install-force
accepting the same values). Use .list bundles to see what's installed and .uninstall <name> to remove a bundle.
See Bundles for the expected repo layout, conflict resolution, secret handling, and the coyote-bundle-template starter you can fork.
.uninstall - Uninstall a bundle
The .uninstall command removes a bundle installed with .install: it deletes the files the bundle owns, removes the
mcp.json entries it added, and drops its record. Files you've modified locally are kept unless you confirm their
deletion, and anything the bundle never owned is left untouched.
| Command | Description |
|---|---|
.uninstall <name> |
Uninstall by bundle name (see .list bundles) |
.uninstall <source-url> |
Uninstall by the source URL the bundle was installed from |
.uninstall <owner>/<repo> |
Match against recorded sources; multiple matches show an interactive selector |
The CLI equivalent is coyote --uninstall <name> (add --yes to skip confirmation prompts).
.update - Update Coyote
The .update command updates the Coyote binary itself to the latest release,
without leaving the REPL to run a separate installer.
| Command | Description |
|---|---|
.update |
Update to the latest release |
.update latest |
Update to the latest release |
.update <version> |
Update to a specific release (e.g. .update v0.4.0) |
A version may be given either bare (0.4.0) or v-prefixed (v0.4.0). If Coyote
is already on the requested version, it says so and makes no changes; otherwise
it downloads the matching build, replaces the binary, and reports the new
version. Restart Coyote for the update to take effect.
If Coyote was installed via Homebrew or cargo install, .update prints a
warning (updating in place desyncs your package manager) and asks for
confirmation before continuing; for those installs, prefer brew upgrade coyote
or cargo install --locked coyote-ai.
.update cannot be run from inside a macro. The same operation is available on
the command line as coyote --update. For full CLI details, including the
--force flag for non-interactive updates, see the Installation documentation.
.info - Display information about the current mode
The .info command provides useful information about different modes that Coyote may be operating in. It's helpful if you
want a quick understanding of the system info, a role's configuration, an agent's configuration, etc.
The following entities are supported:
| Command | Description |
|---|---|
.info |
Display system information (identical to the --info flag) |
.info role |
Display information about the active role |
.info session |
Display information about the active session |
.info agent |
Display information about the active agent |
.info rag |
Display information about the active RAG |
.info mcp-server <server> |
Show a running MCP server's transport, capabilities, and tool whitelist layers, with a per-tool allowed/hidden breakdown |
.info tools |
List every tool that would be sent in the next chat completion request (composed across role, agent, skills, and MCP filters). Errors when function_calling_support is disabled. |
.info todo |
Show the current todo list driving auto-continuation (goal, progress count, and per-task status). Only available when auto_continue is enabled. |
.mcp auth - Authenticate with an OAuth-protected MCP server
Some remote MCP servers (such as Notion, Jira, etc.) require OAuth authentication before they can be used. Run this command once per server to complete the authorization flow:
.mcp auth <server-name>
where <server-name> matches the key in your mcp.json file. Tab completion is available.
What happens:
- Coyote discovers the server's OAuth endpoints automatically via RFC 9728 metadata discovery.
- If the server supports Dynamic Client Registration (RFC 7591), Coyote registers itself automatically, meaning no
oauth.clientIdconfiguration is required. - Your browser opens to the server's authorization page. Log in and approve access.
- The token is saved to
<cache_dir>/coyote/oauth/and loaded automatically on subsequent startups. - Tokens are refreshed automatically when they expire.
If a server requires authentication but you haven't run .mcp auth yet, Coyote will skip that server at startup
with a warning rather than failing outright. The warning tells you exactly which command to run.
The same flow is available outside the REPL via coyote --auth-mcp <server-name>.
For full configuration options and an example for Notion, see the MCP Servers documentation.
.authenticate - Authenticate the current model client via OAuth
The .authenticate command will start the OAuth flow for the current model client if
- The client supports OAuth (See the clients documentation for supported clients)
- The client is configured in your Coyote configuration to use OAuth via the
auth: oauthproperty
.exit - Exit an agent/role/session/rag or the Coyote REPL itself
The .exit command is used to move between modes in the Coyote REPL.
| Command | Description |
|---|---|
.exit role |
Exit the active role |
.exit session |
Exit the active session |
.exit agent |
Exit the active agent |
.exit rag |
Exit the active RAG |
.exit |
Exit the Coyote REPL |
.help - Show the help guide
Just like with any shell or REPL, you sometimes need a little help and want to know what commands are available to you.
That's when you use the .help command.
!<command> - Run an arbitrary shell command
Prefix any line with ! to run the rest of the line as a shell command instead of sending it to the LLM. Output streams
straight to your terminal in real time, and you don't spend any tokens and no output is sent to the LLM.
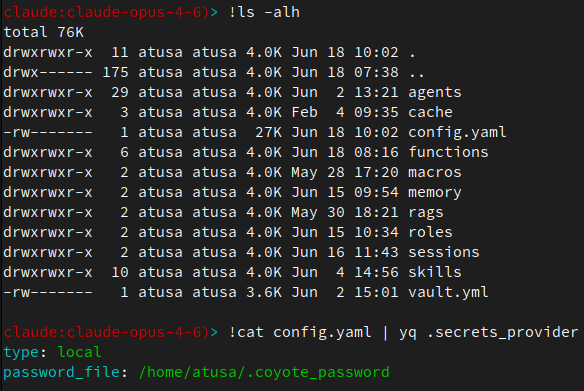
Particularly useful inside coyote --sandbox where you need to modify the sandbox itself without running
sbx exec <name> -- <command>; e.g., !apt-get install httpie, !git pull, !cargo build,
or anything else you'd normally run in a terminal, without leaving the REPL.
How it works
- The line is passed to your shell as
<SHELL> -c "<your command>". Note that Coyote does not inspect or sanitize the command, but rather the shell parses it. So pipes (!ls | grep yaml), redirects (!cat > /tmp/out), env-var expansion (!echo "$HOME"), globbing (!ls *.toml), command substitution (!grep ERROR $(ls *.log)), and inline env vars (!FOO=bar cmd) all work exactly like they do in a normal terminal. - The
!must be the first character of the line. Lines like!ls(leading whitespace),echo !foo(inline!), or!(just whitespace after) are not recognized as shell pass-through; The first two go to the LLM, the last prints a usage hint. - Press
Ctrl-Cat any time to interrupt a long-running command.SIGINTpropagates to the child shell; the command stops,[exit 130]prints, and you return to the prompt. - If the command exits non-zero,
[exit N]is printed. Successful commands return to the prompt silently.
Limitations
!cd /tmpdoes not persist. Each!cmdruns in a fresh child shell, so subsequent!pwdwill show the REPL's original working directory, not/tmp.- The command is not written to your shell's history file (
~/.bash_history,~/.zsh_history). It is, however, saved in the REPL's reedline history (use up-arrow to recall).